
Build a Custom Connector - DOMO

Domo
DOMO is a cloud-based platform for business intelligence and data visualization.It is able to collect, analyze, and display data in real-time from a variety of sources, which helps them to make data-driven choices and acquire understanding of their company operations.
Connector
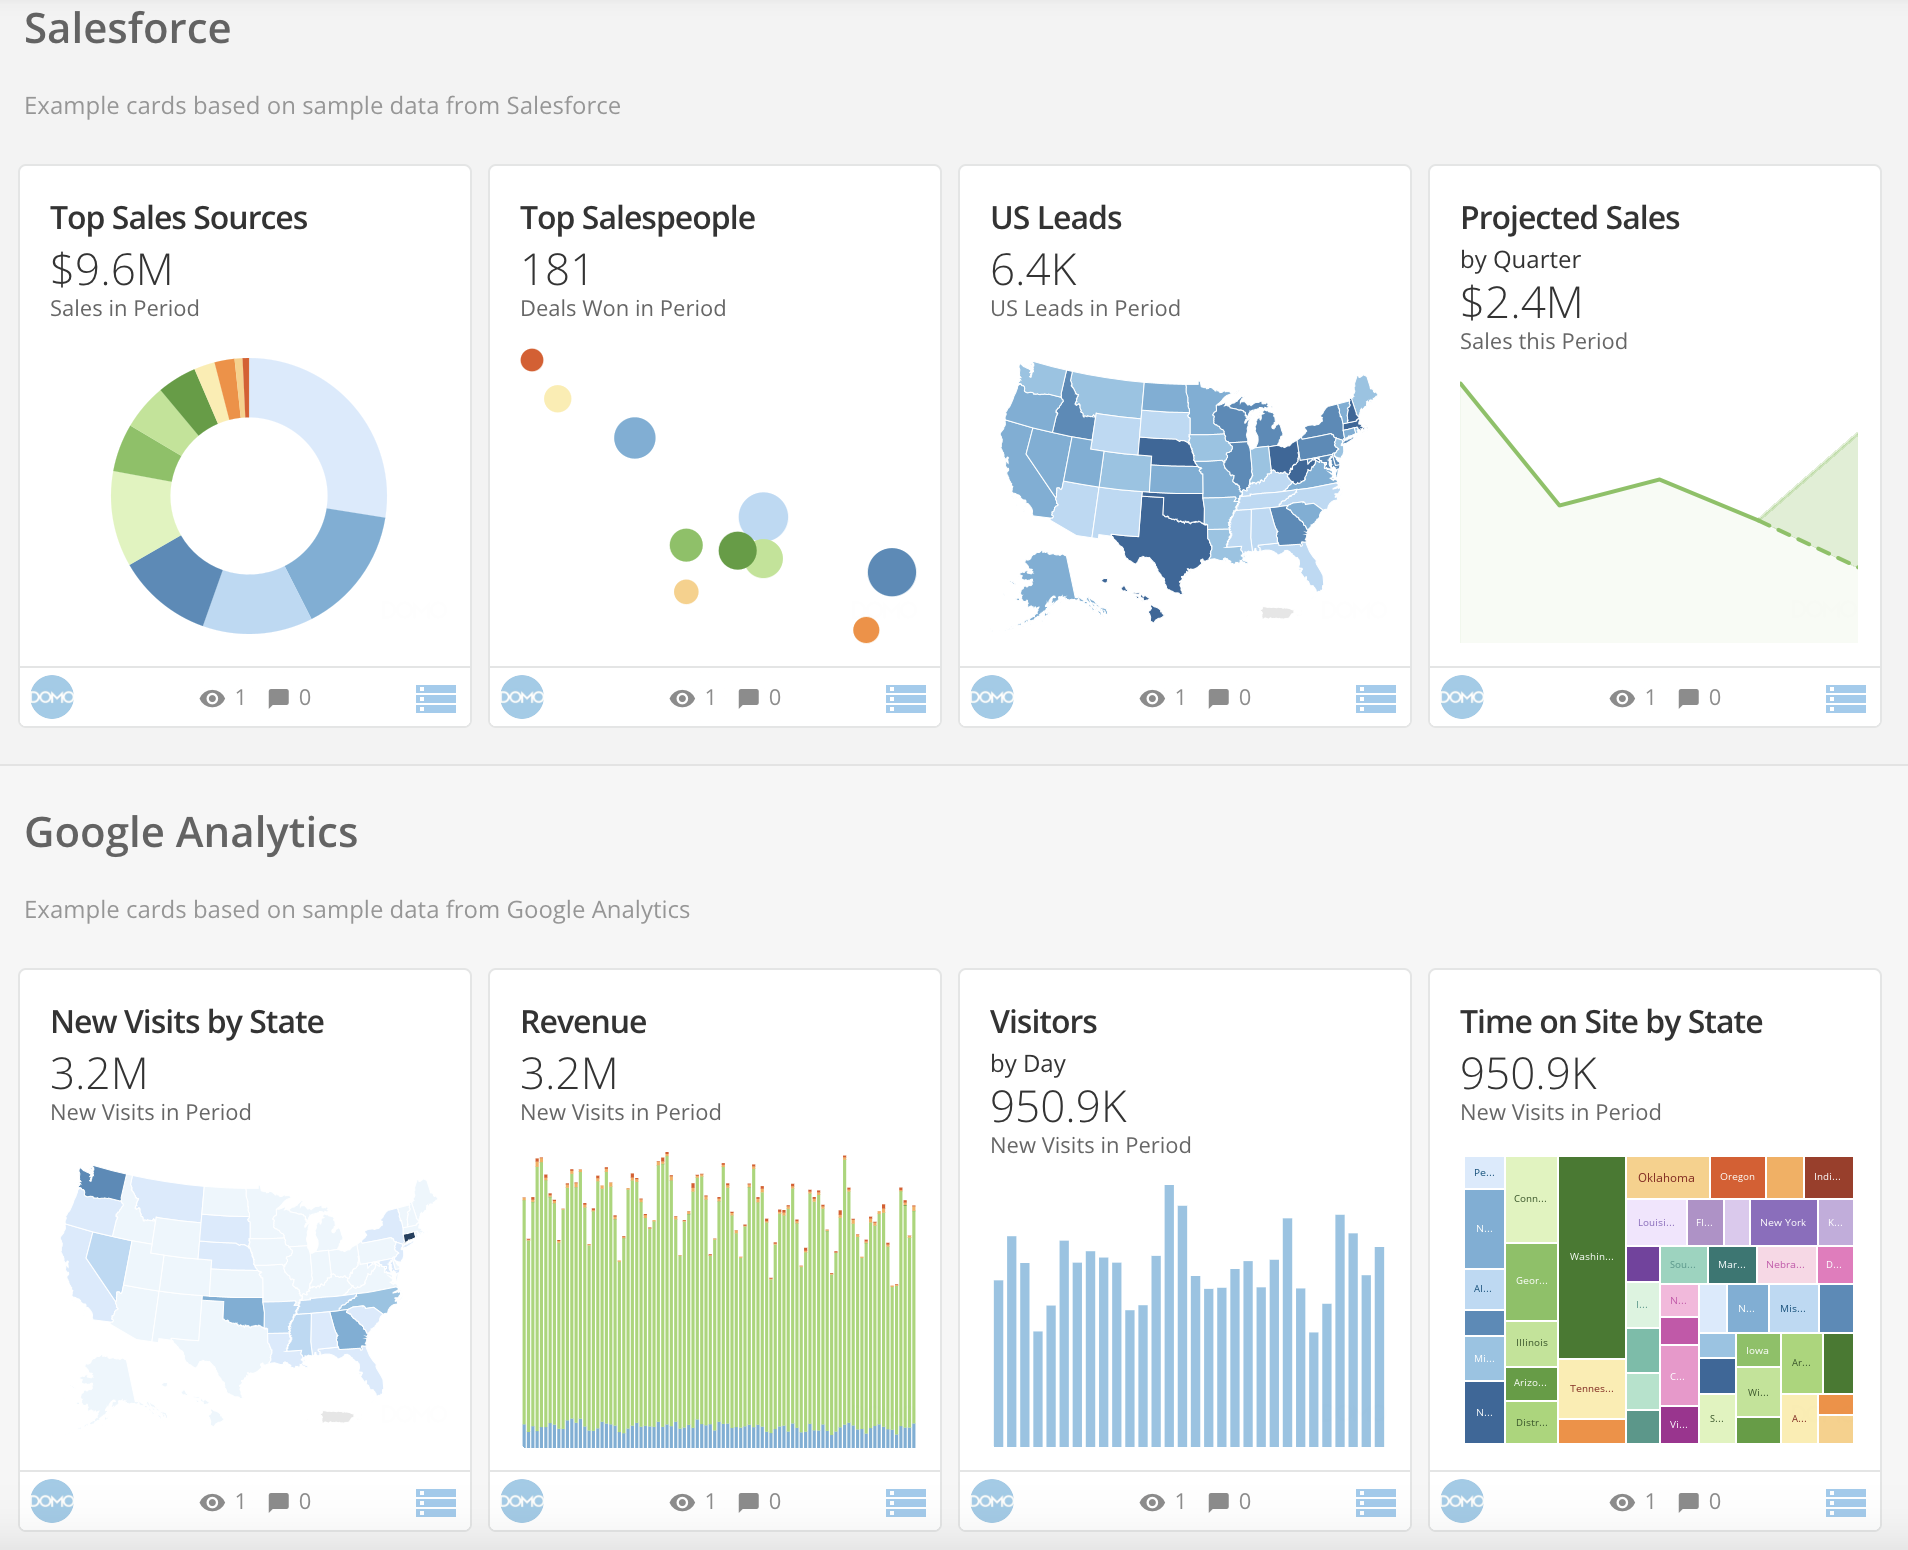
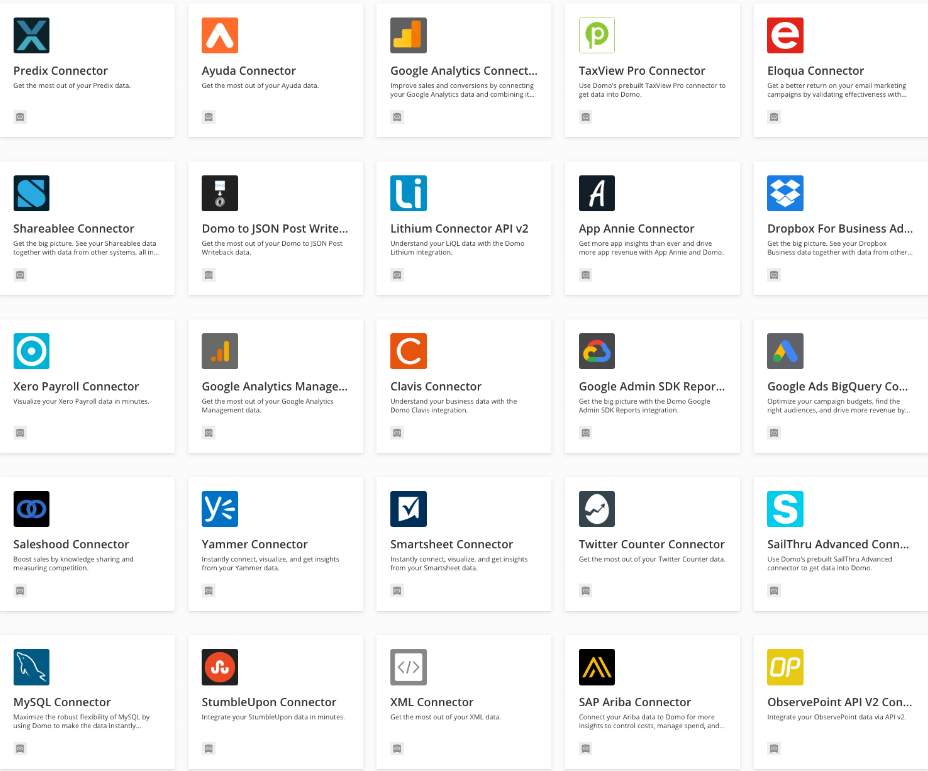
Connector is one of the key components of the DOMO.It is a software that enables DOMO to connect to and extract data from particular data sources. There are many pre-built connectors that are intended to create an effortless link between Domo and the source system, enabling users to import data manually or without writing any complicated code.
Why custom connector?
Domo pre-built connectors may not necessarily always support the user needs. Sometime, there is need for user to access data from specialized or unique systems that might not have a standard connector readily available. In such scenario, we need to build our own connector.
Prerequisite
- Domo account.
- Domo developer account.
If you do not have a Domo and developer account, you can register a 30 days free account in Domo. (Sign up free to get started with Domo)
Let’s get started
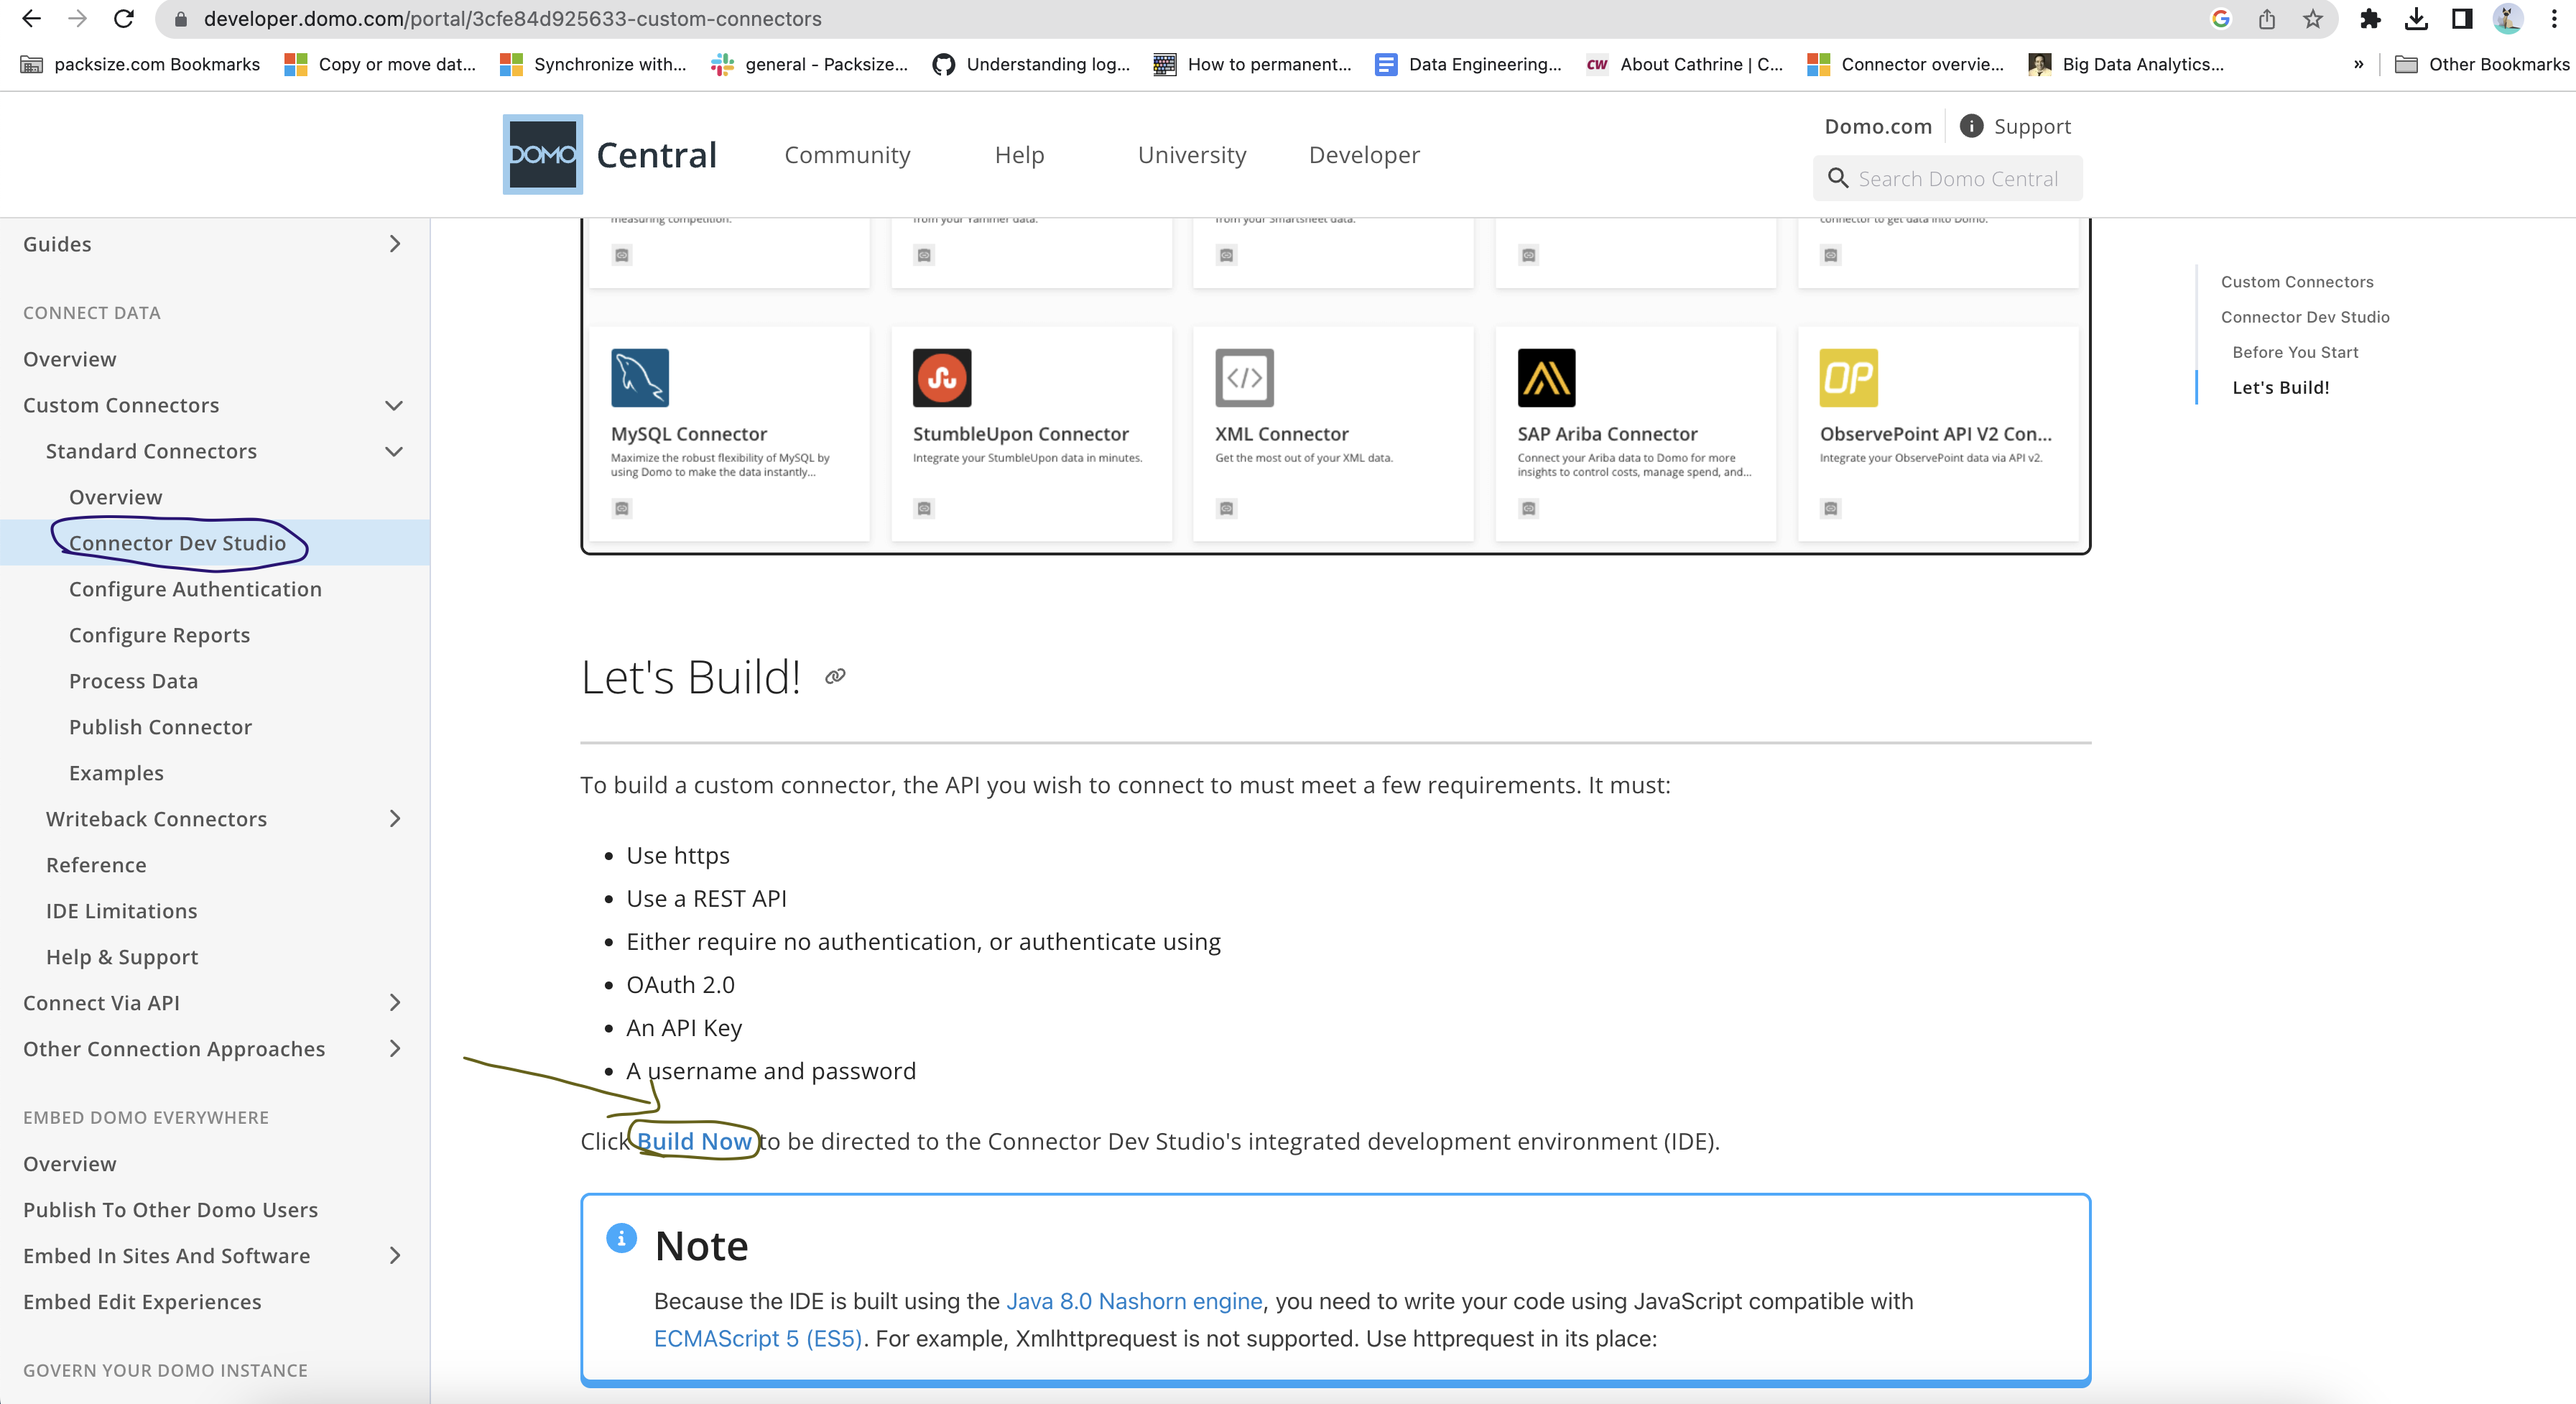
Visit Domo developer site and click Build Now to be directed to the Connector Dev Studio’s integrated development environment (IDE) or we can directly use the link below:
(https://api.domo.com/builder/index.html#!/login)
Step1: Verify Domo Domain

We will be prompted a screen to enter the Domo domain. Enter a domain and click on “continue”.
Step2: Login to Domo Account
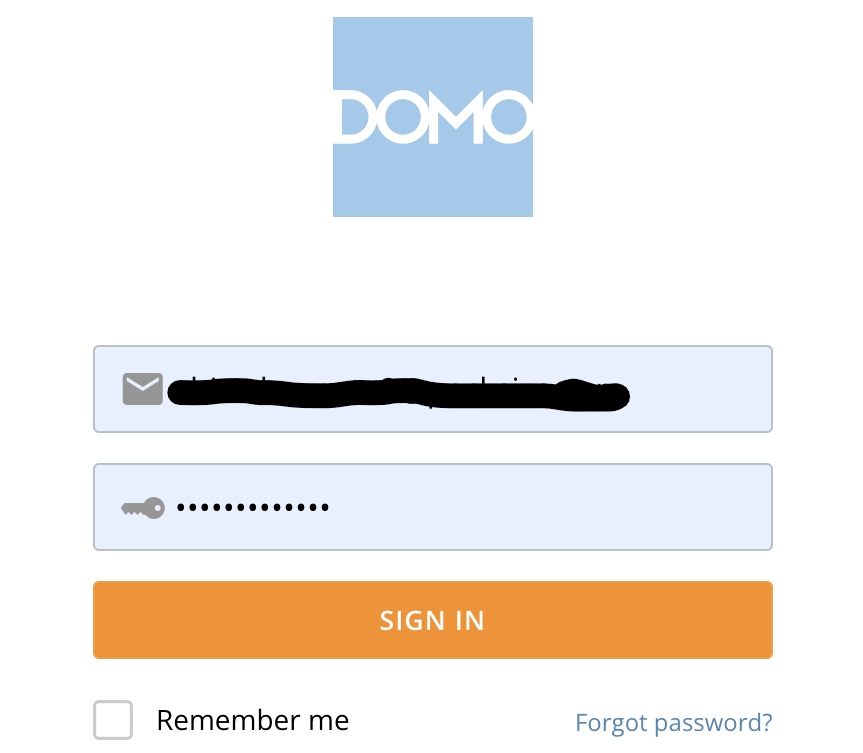
We need to authenticate again using email and password against that specific domain. So enter the credentials and click on “Sign In”.
Step3 : Register New Connector
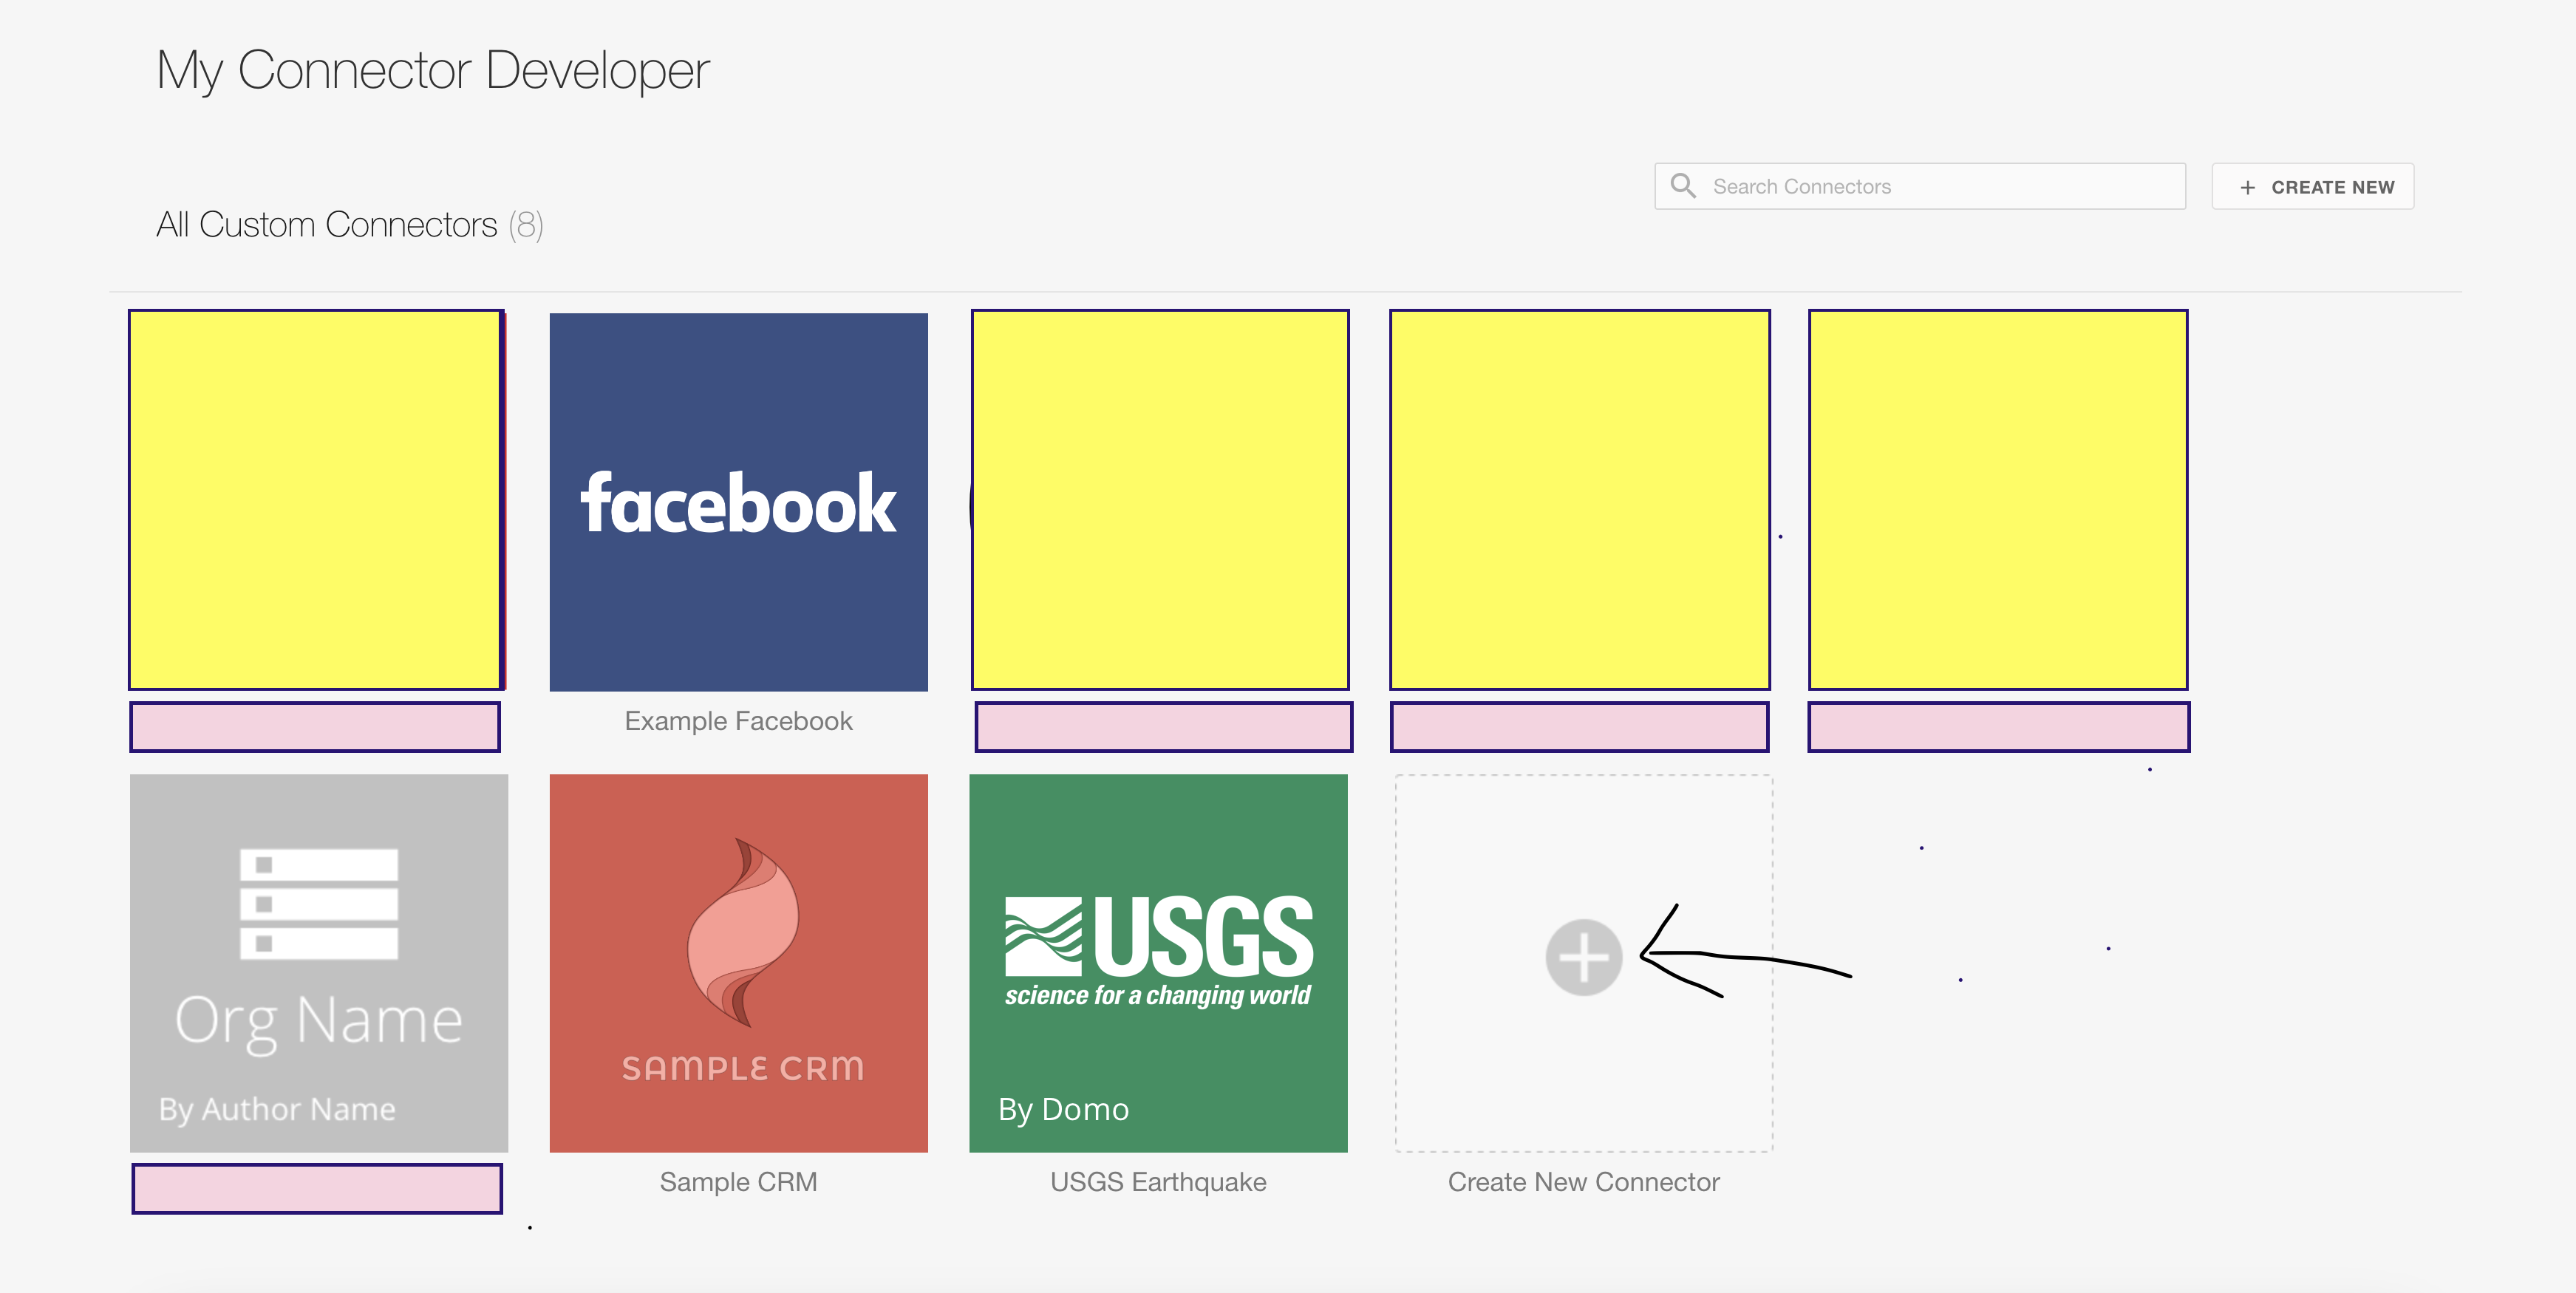
Click on the plus icon and add a new connector.
Step4 : Choose Connector Type
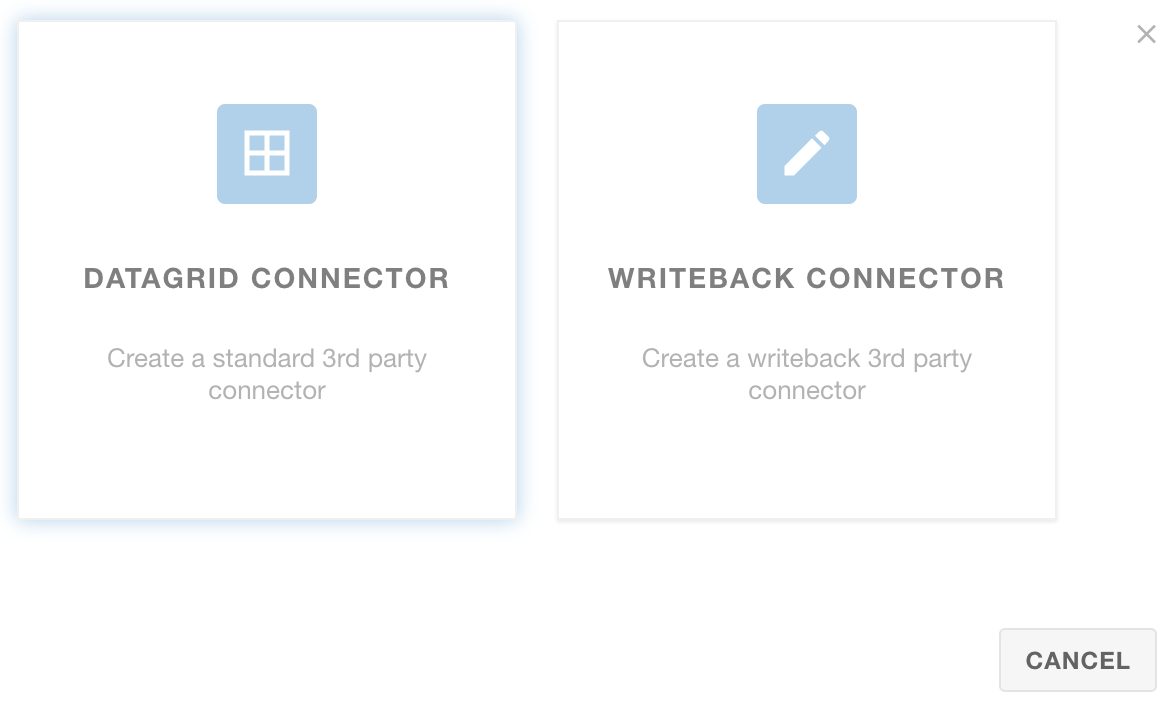
Choose “DATAGRID CONNECTOR” for now. If you want to learn more about the Domo connector and it’s type, please refer to this link Domo Connector
Step5 : Name the Connector
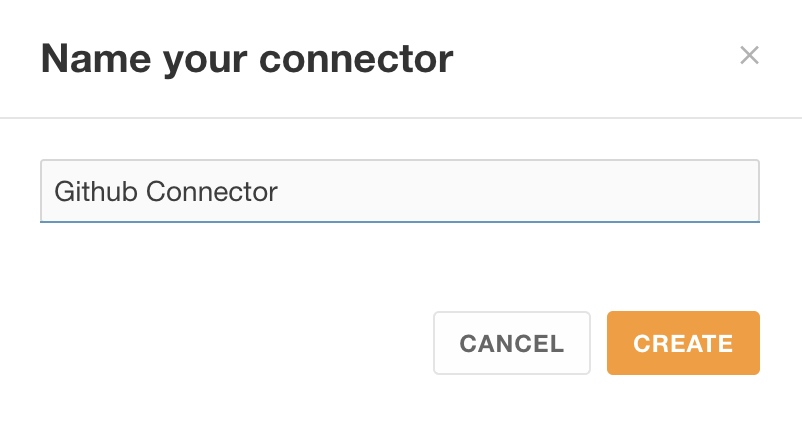
I will name the connector Github Connector as we will connect Domo with Github and retrieve data from it.
👏 Our new connector “Github Connector” has been successfully registered. 👏 Now let’s move to Github.
Step6 : Register a New OAuth Application in Github
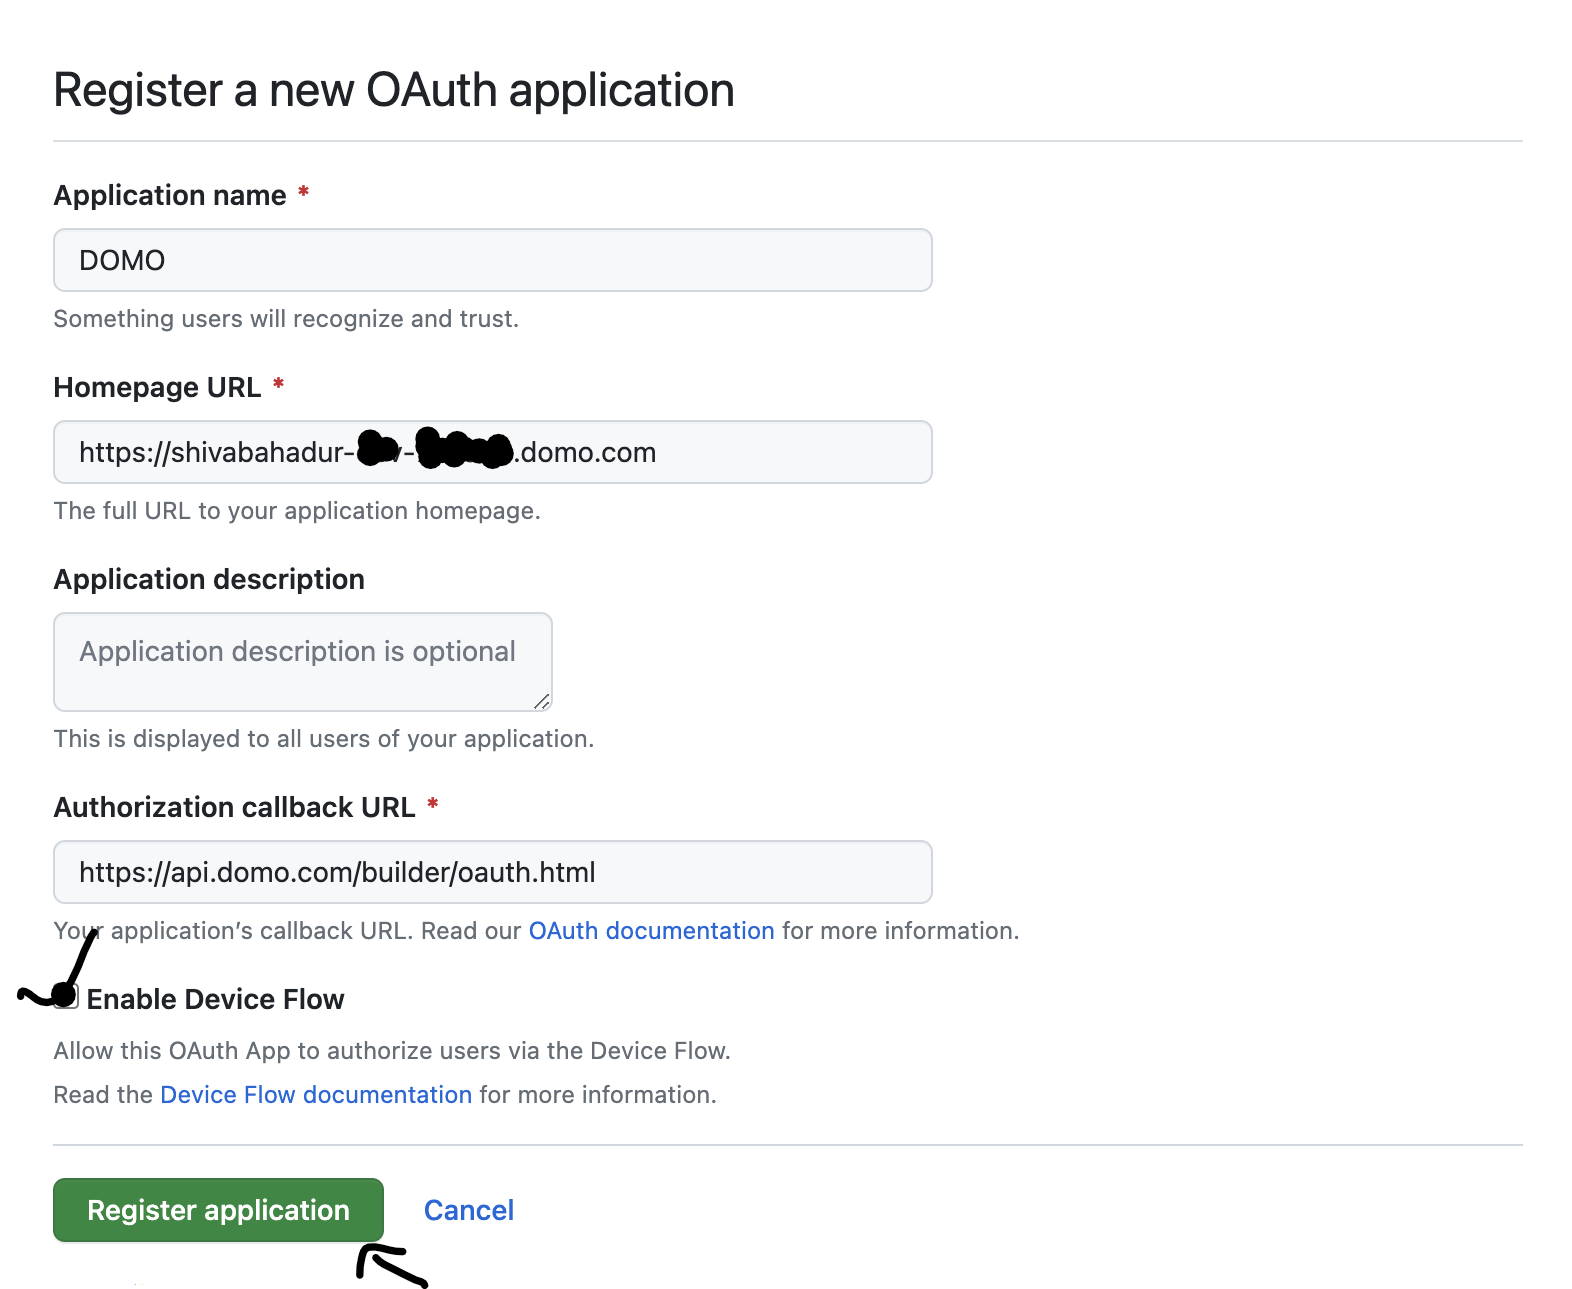
Use this link https://github.com/settings/applications/new to register a new OAuth application in Github.
Step7 : Generate a Client Secret
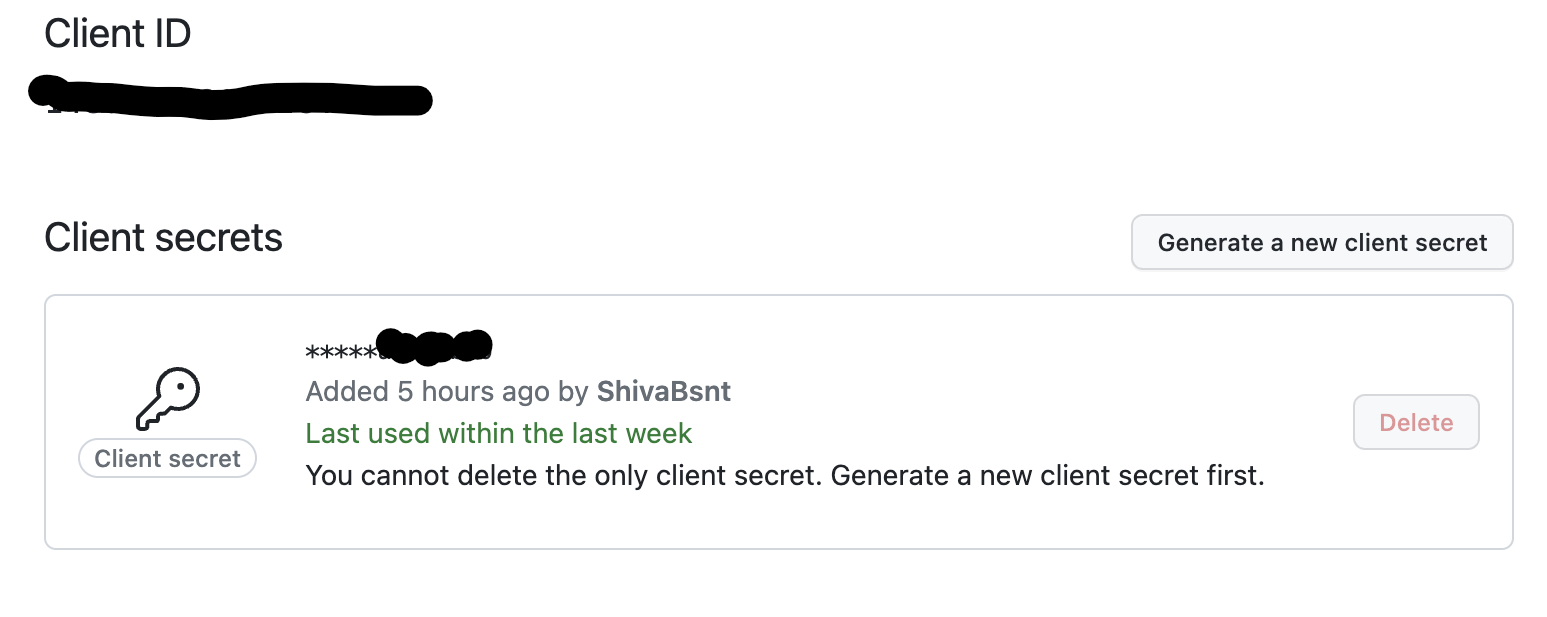
Copy the Client Id and Client secrets and keep it safe. We will need these credentials to authenticate Domo connector.
👏 Since we have successfully completed OAuth app registration on Github, now let’s move back to building our connector.👏
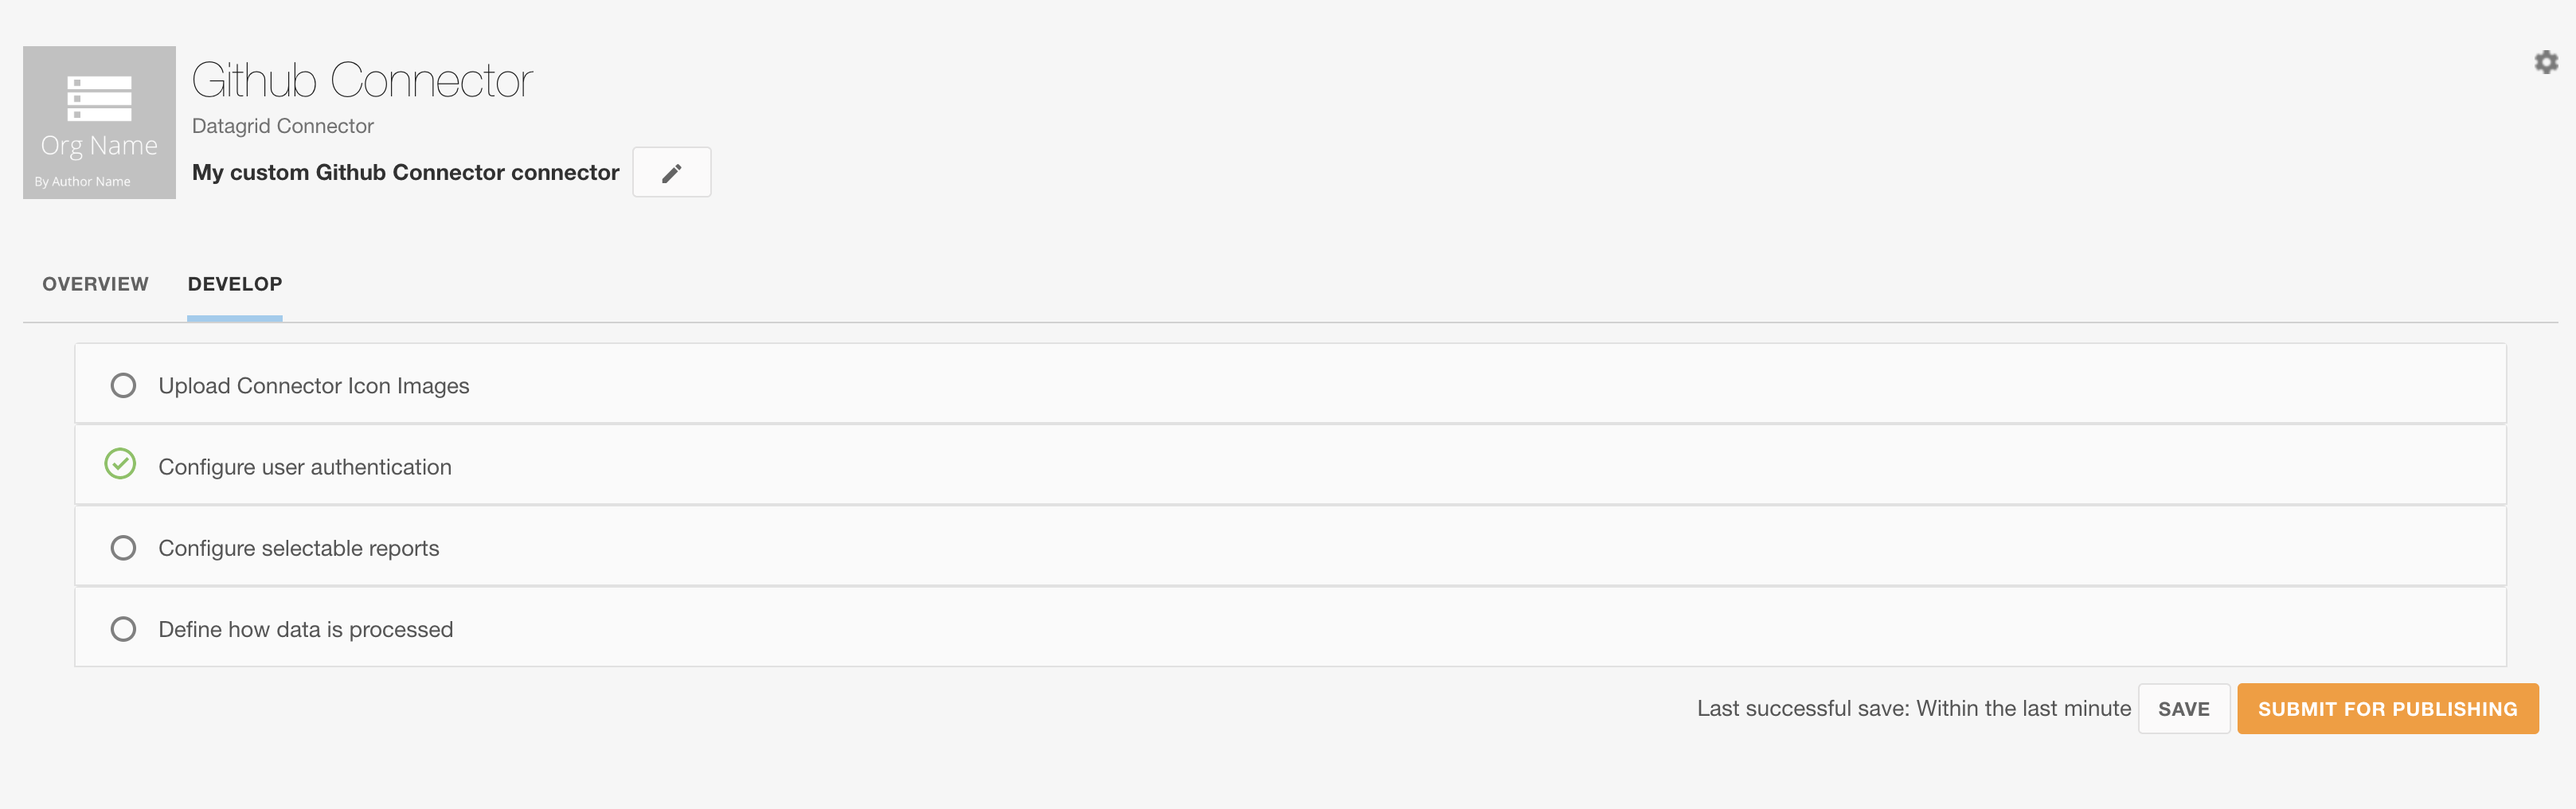
Step8 : Upload Connector Icon Images
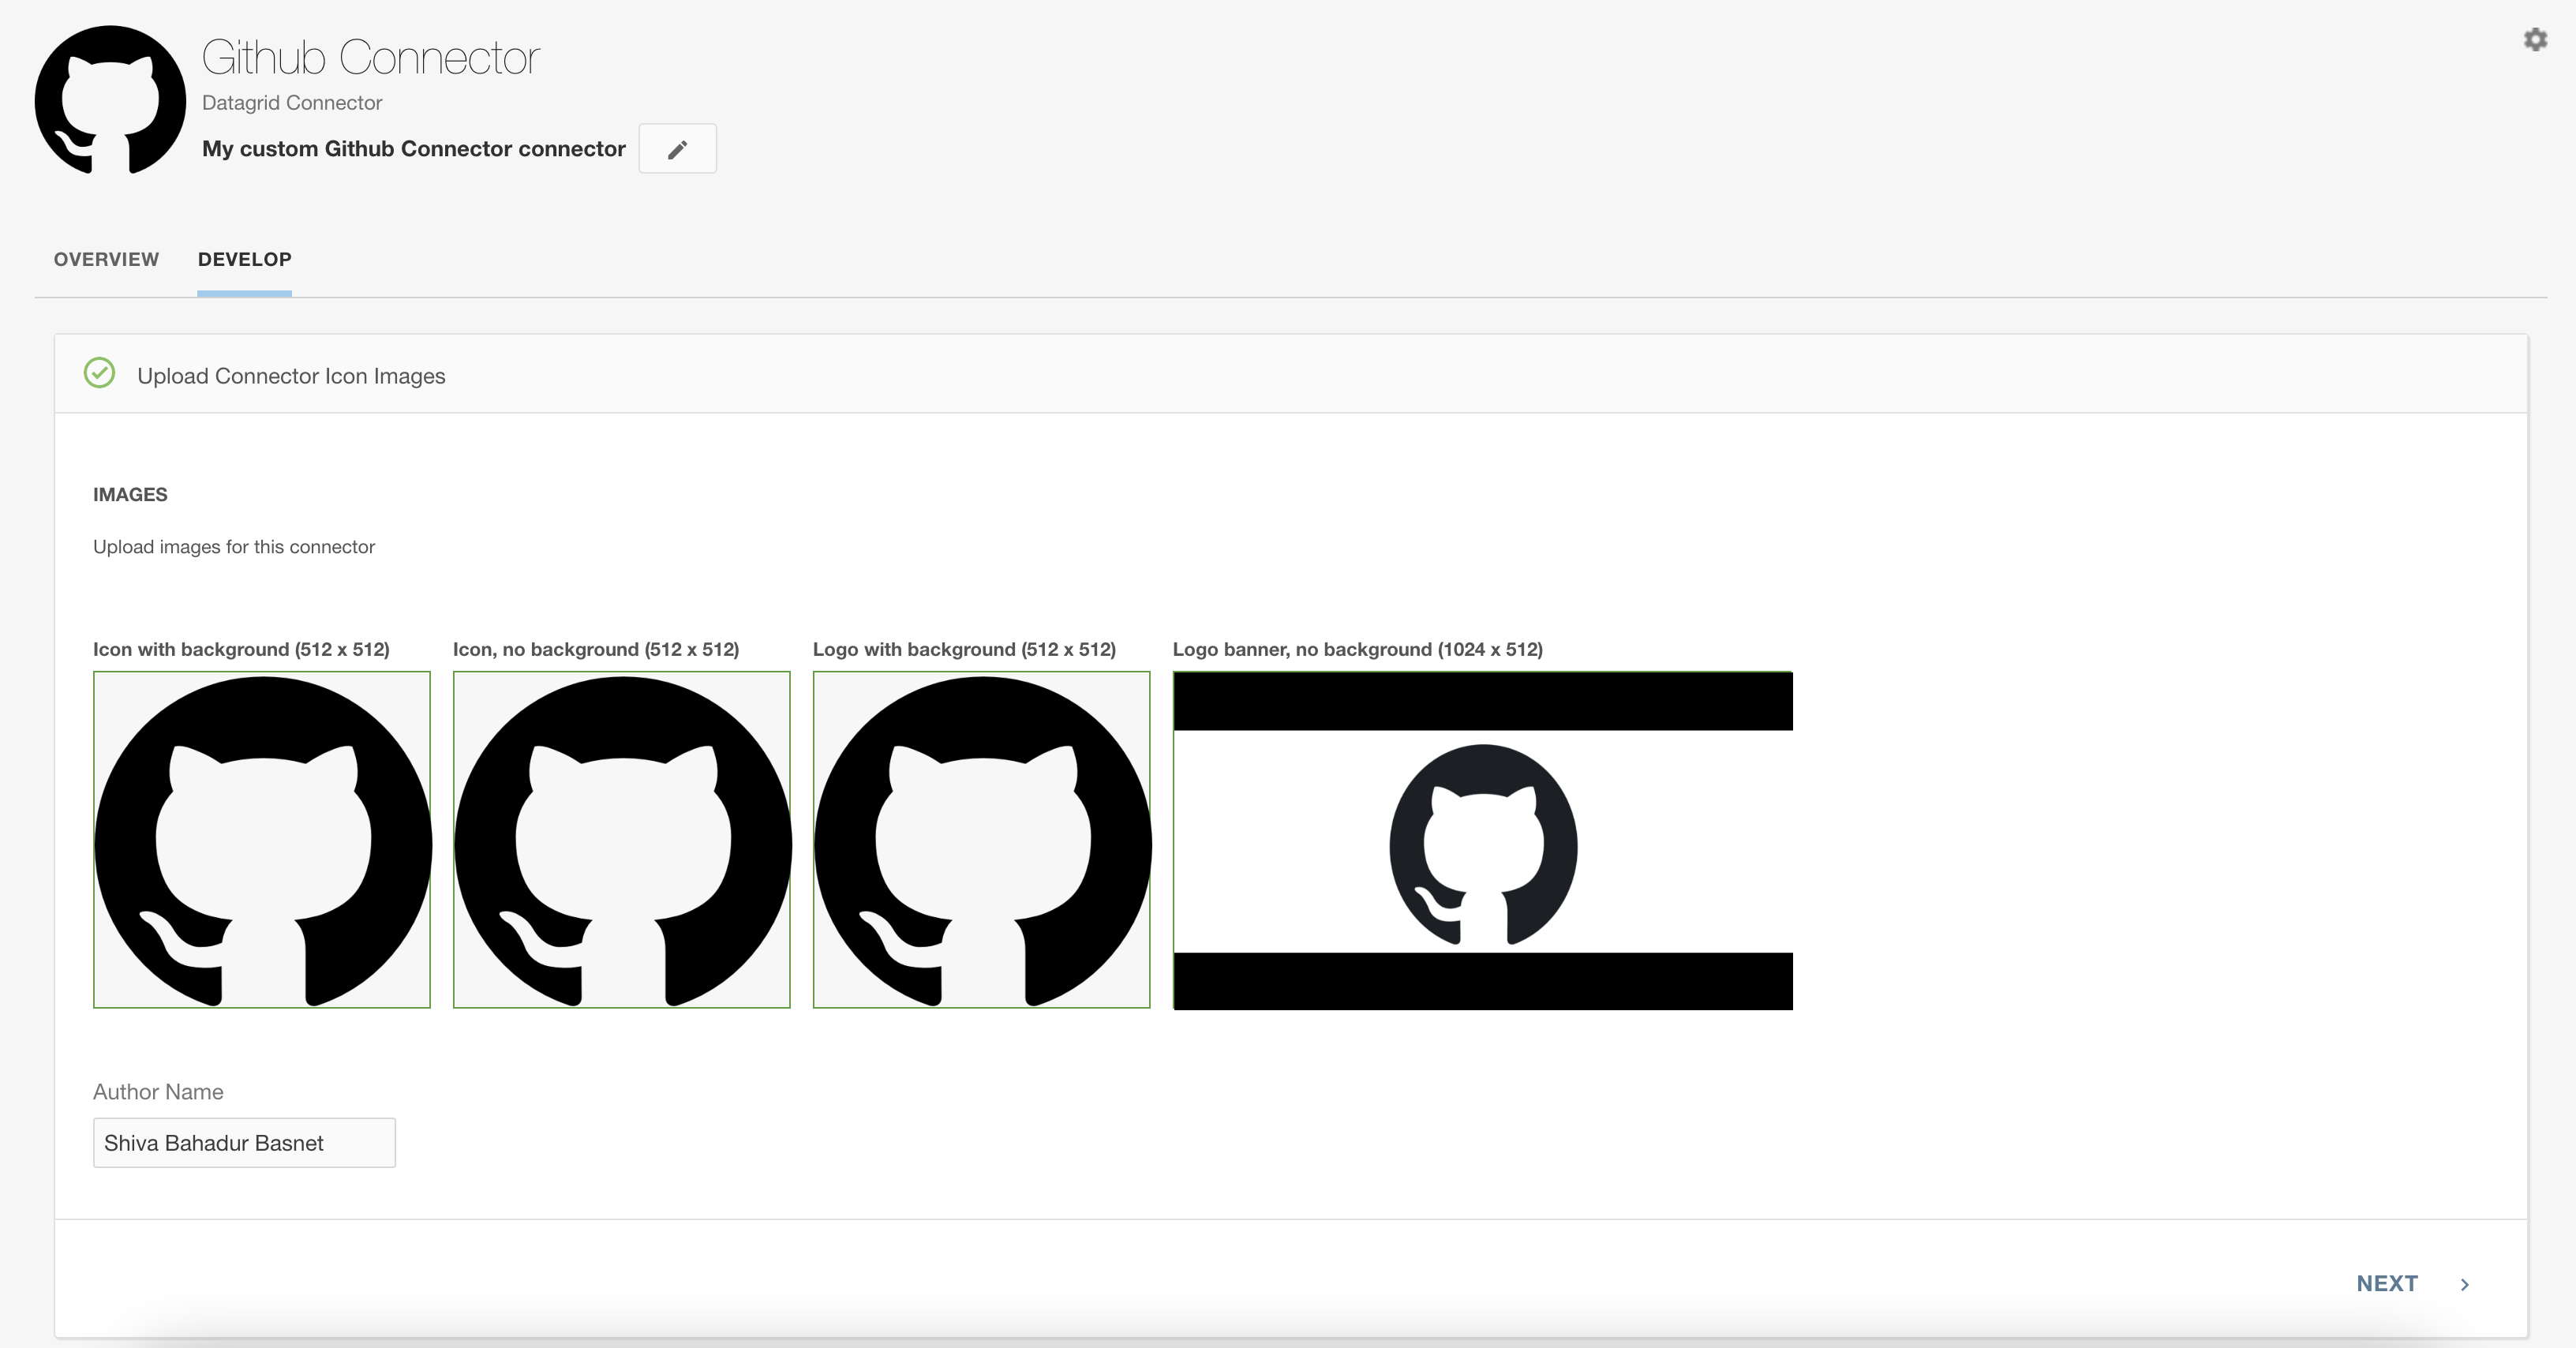
Add the image for connector.It should be strictly of size defined by Domo (512x521, 1024x512). We might have trouble finding exact size,but we can use resize tools to shape the image to our desired ratio.
Step9 : Configure user authentication
The OAuth application we generated earlier on Github is required in this step.
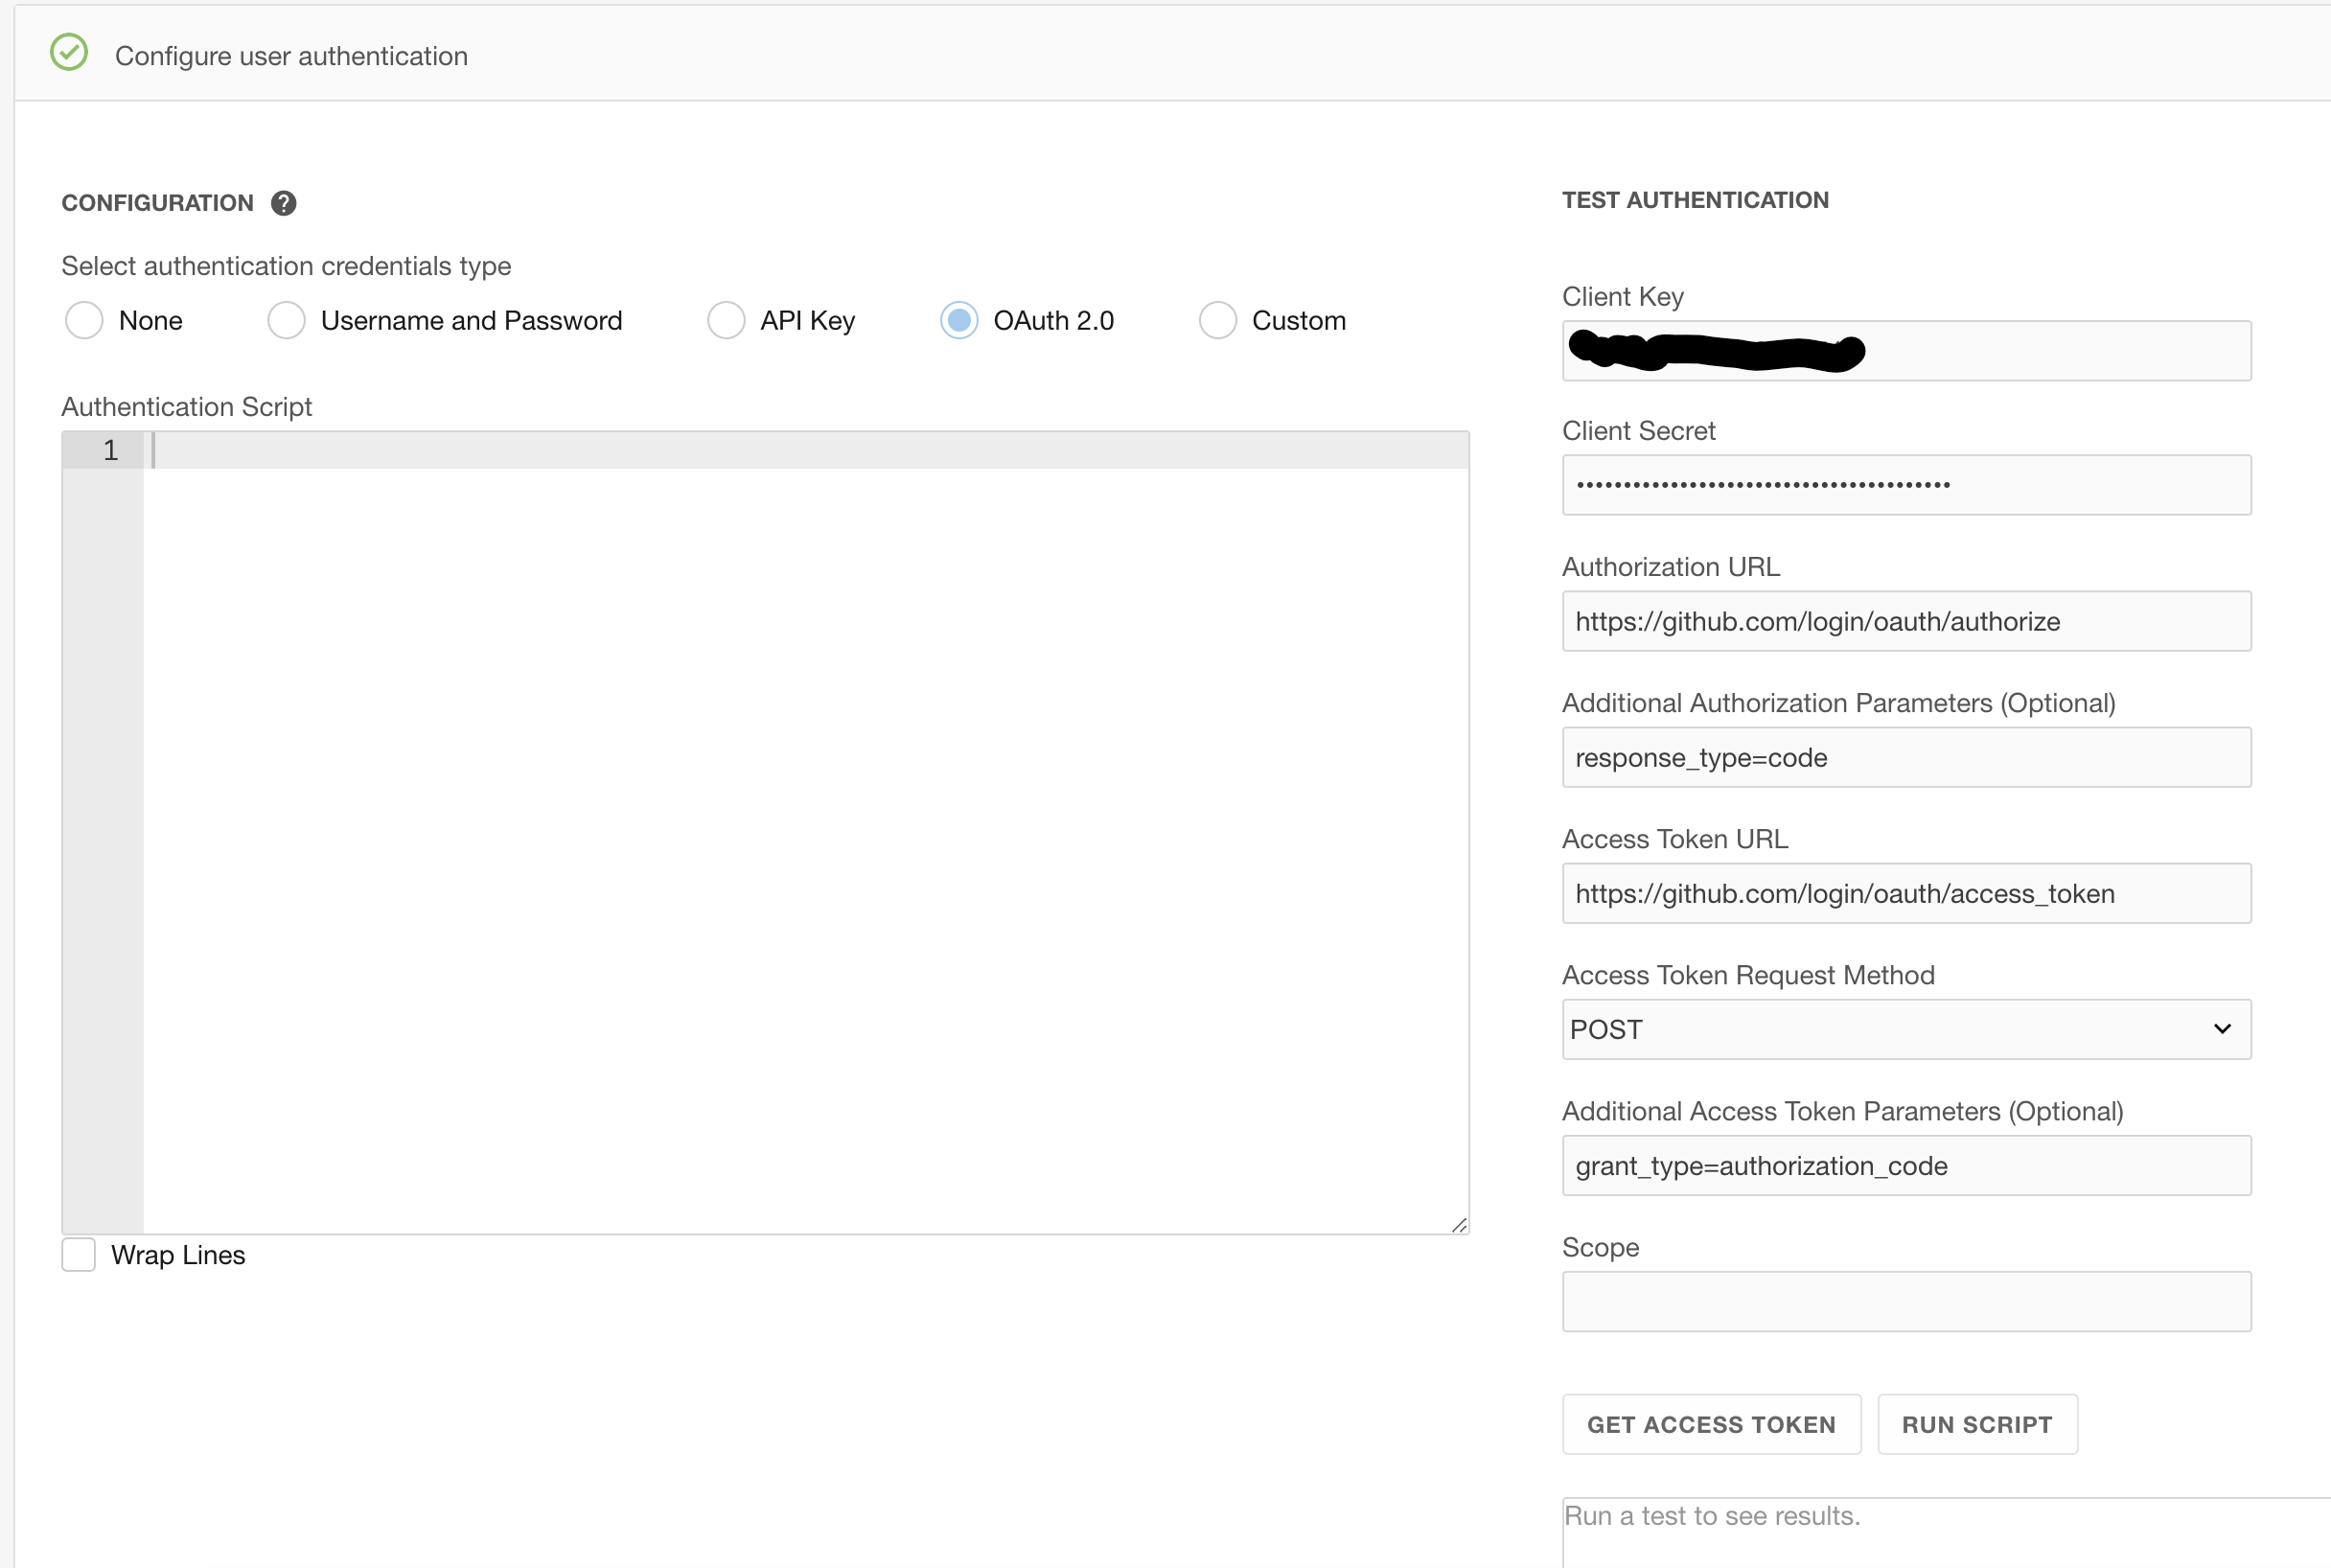
Add your Client Id and Client Secret and copy all the configuration as it is.Here is the configuration.
Client Id - <your_clientid>
Client Secret - <your_clientsecret>
Authorization URL - https://github.com/login/oauth/authorize
Additional Authorization Parameters(Optional) - response_type=code
Access token URL - https://github.com/login/oauth/access_token
Access Token Request Method - POST
Additional Access Token Parameters(Optional) - grant_type=authorization_code
Step10 : Add Available Reports
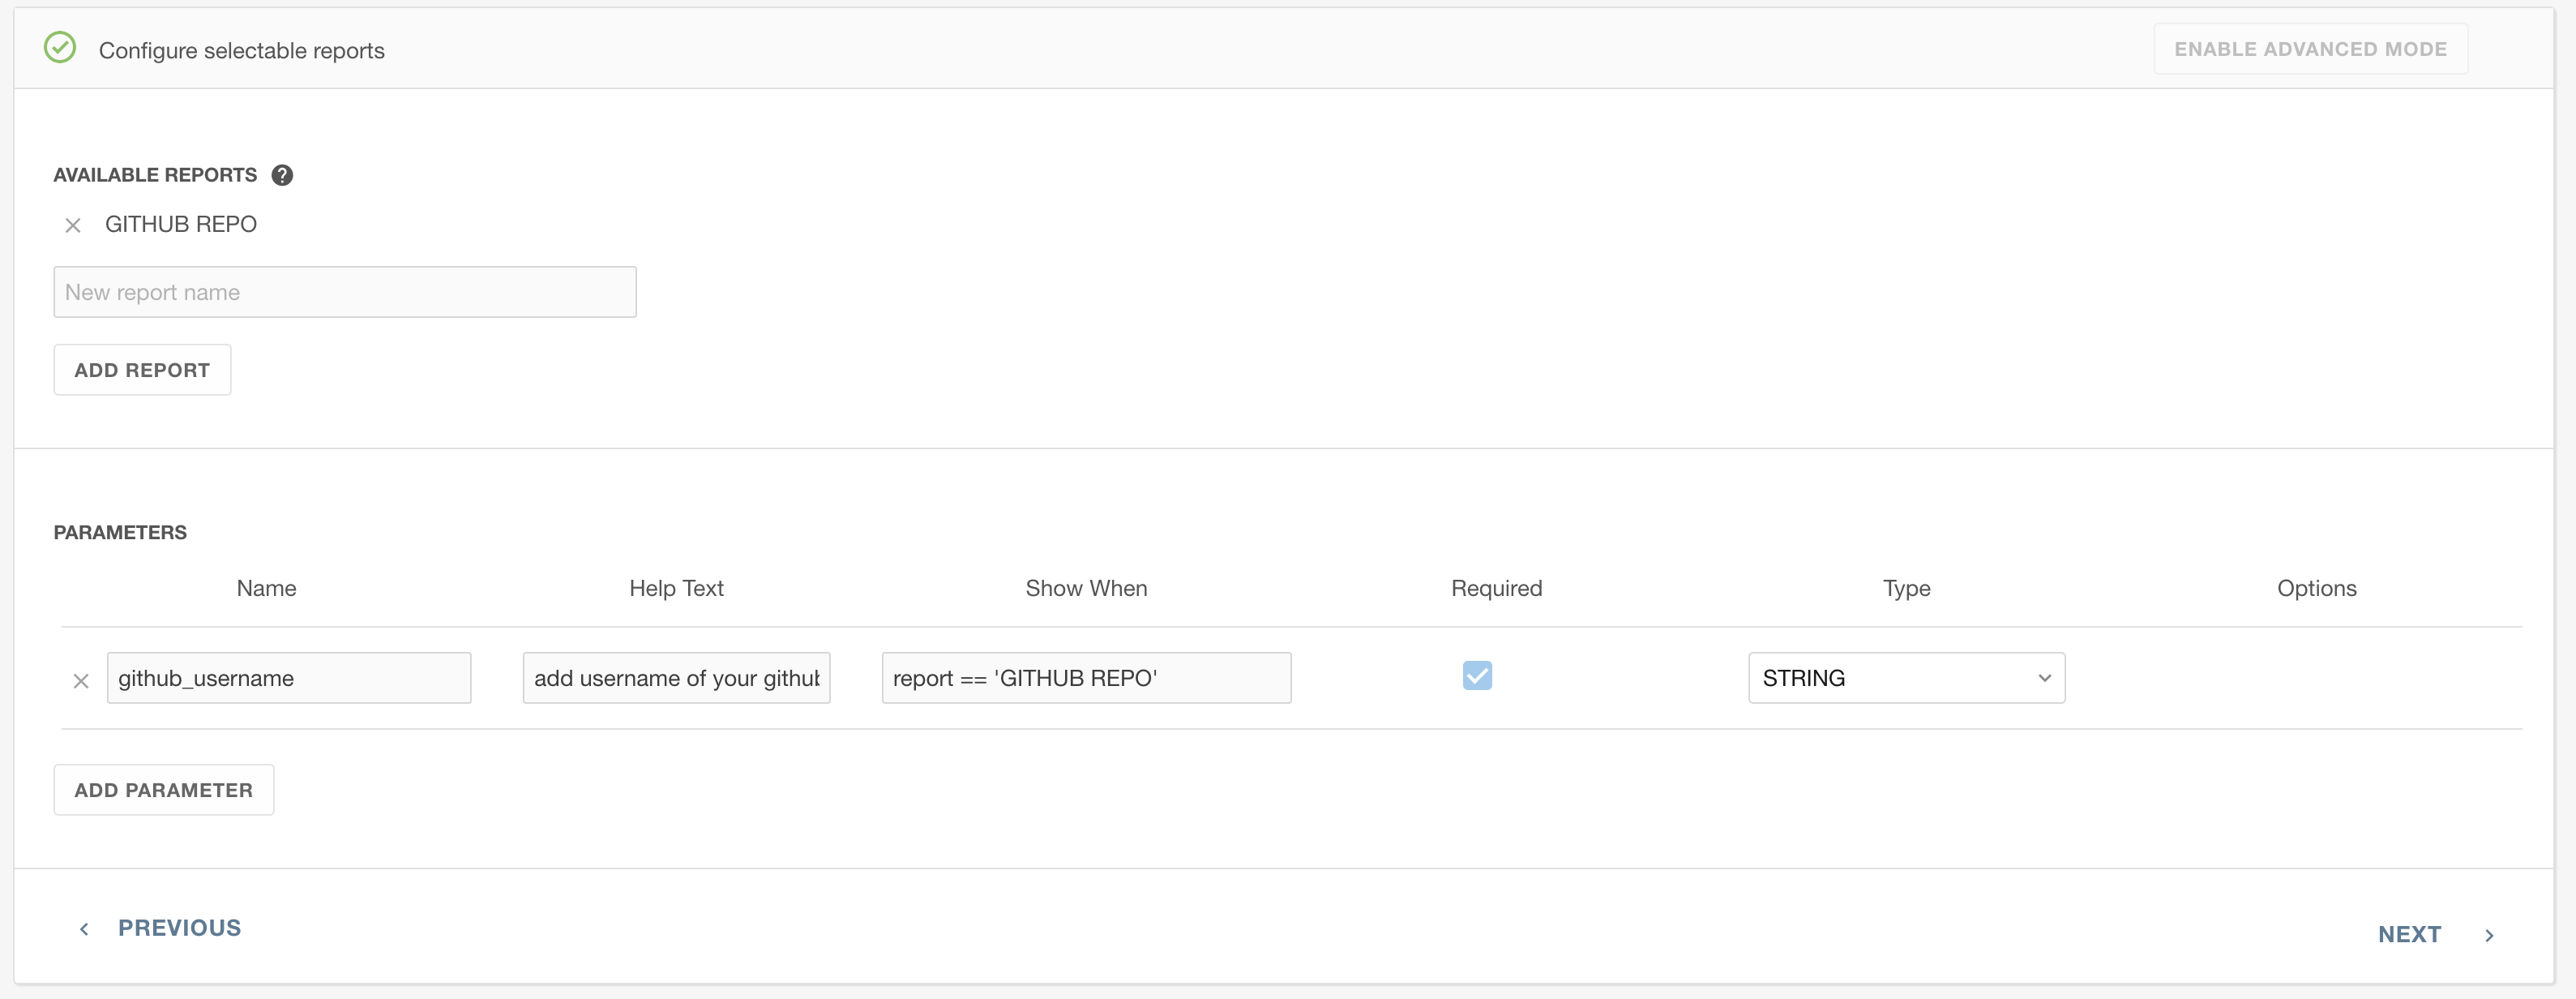
There might be many reports in each connector. Reports provide developers the ability to use various API endpoints or perform different work on the data received. We need to provide the reports that a user may select when using this connector in Domo. So we will add a report “GITHUB REPO” which will retrieve data related to repository in Github. We will also add a parameter “github_username” which will ask user a github username to create a dynamic URL.
Step11 : Process Data
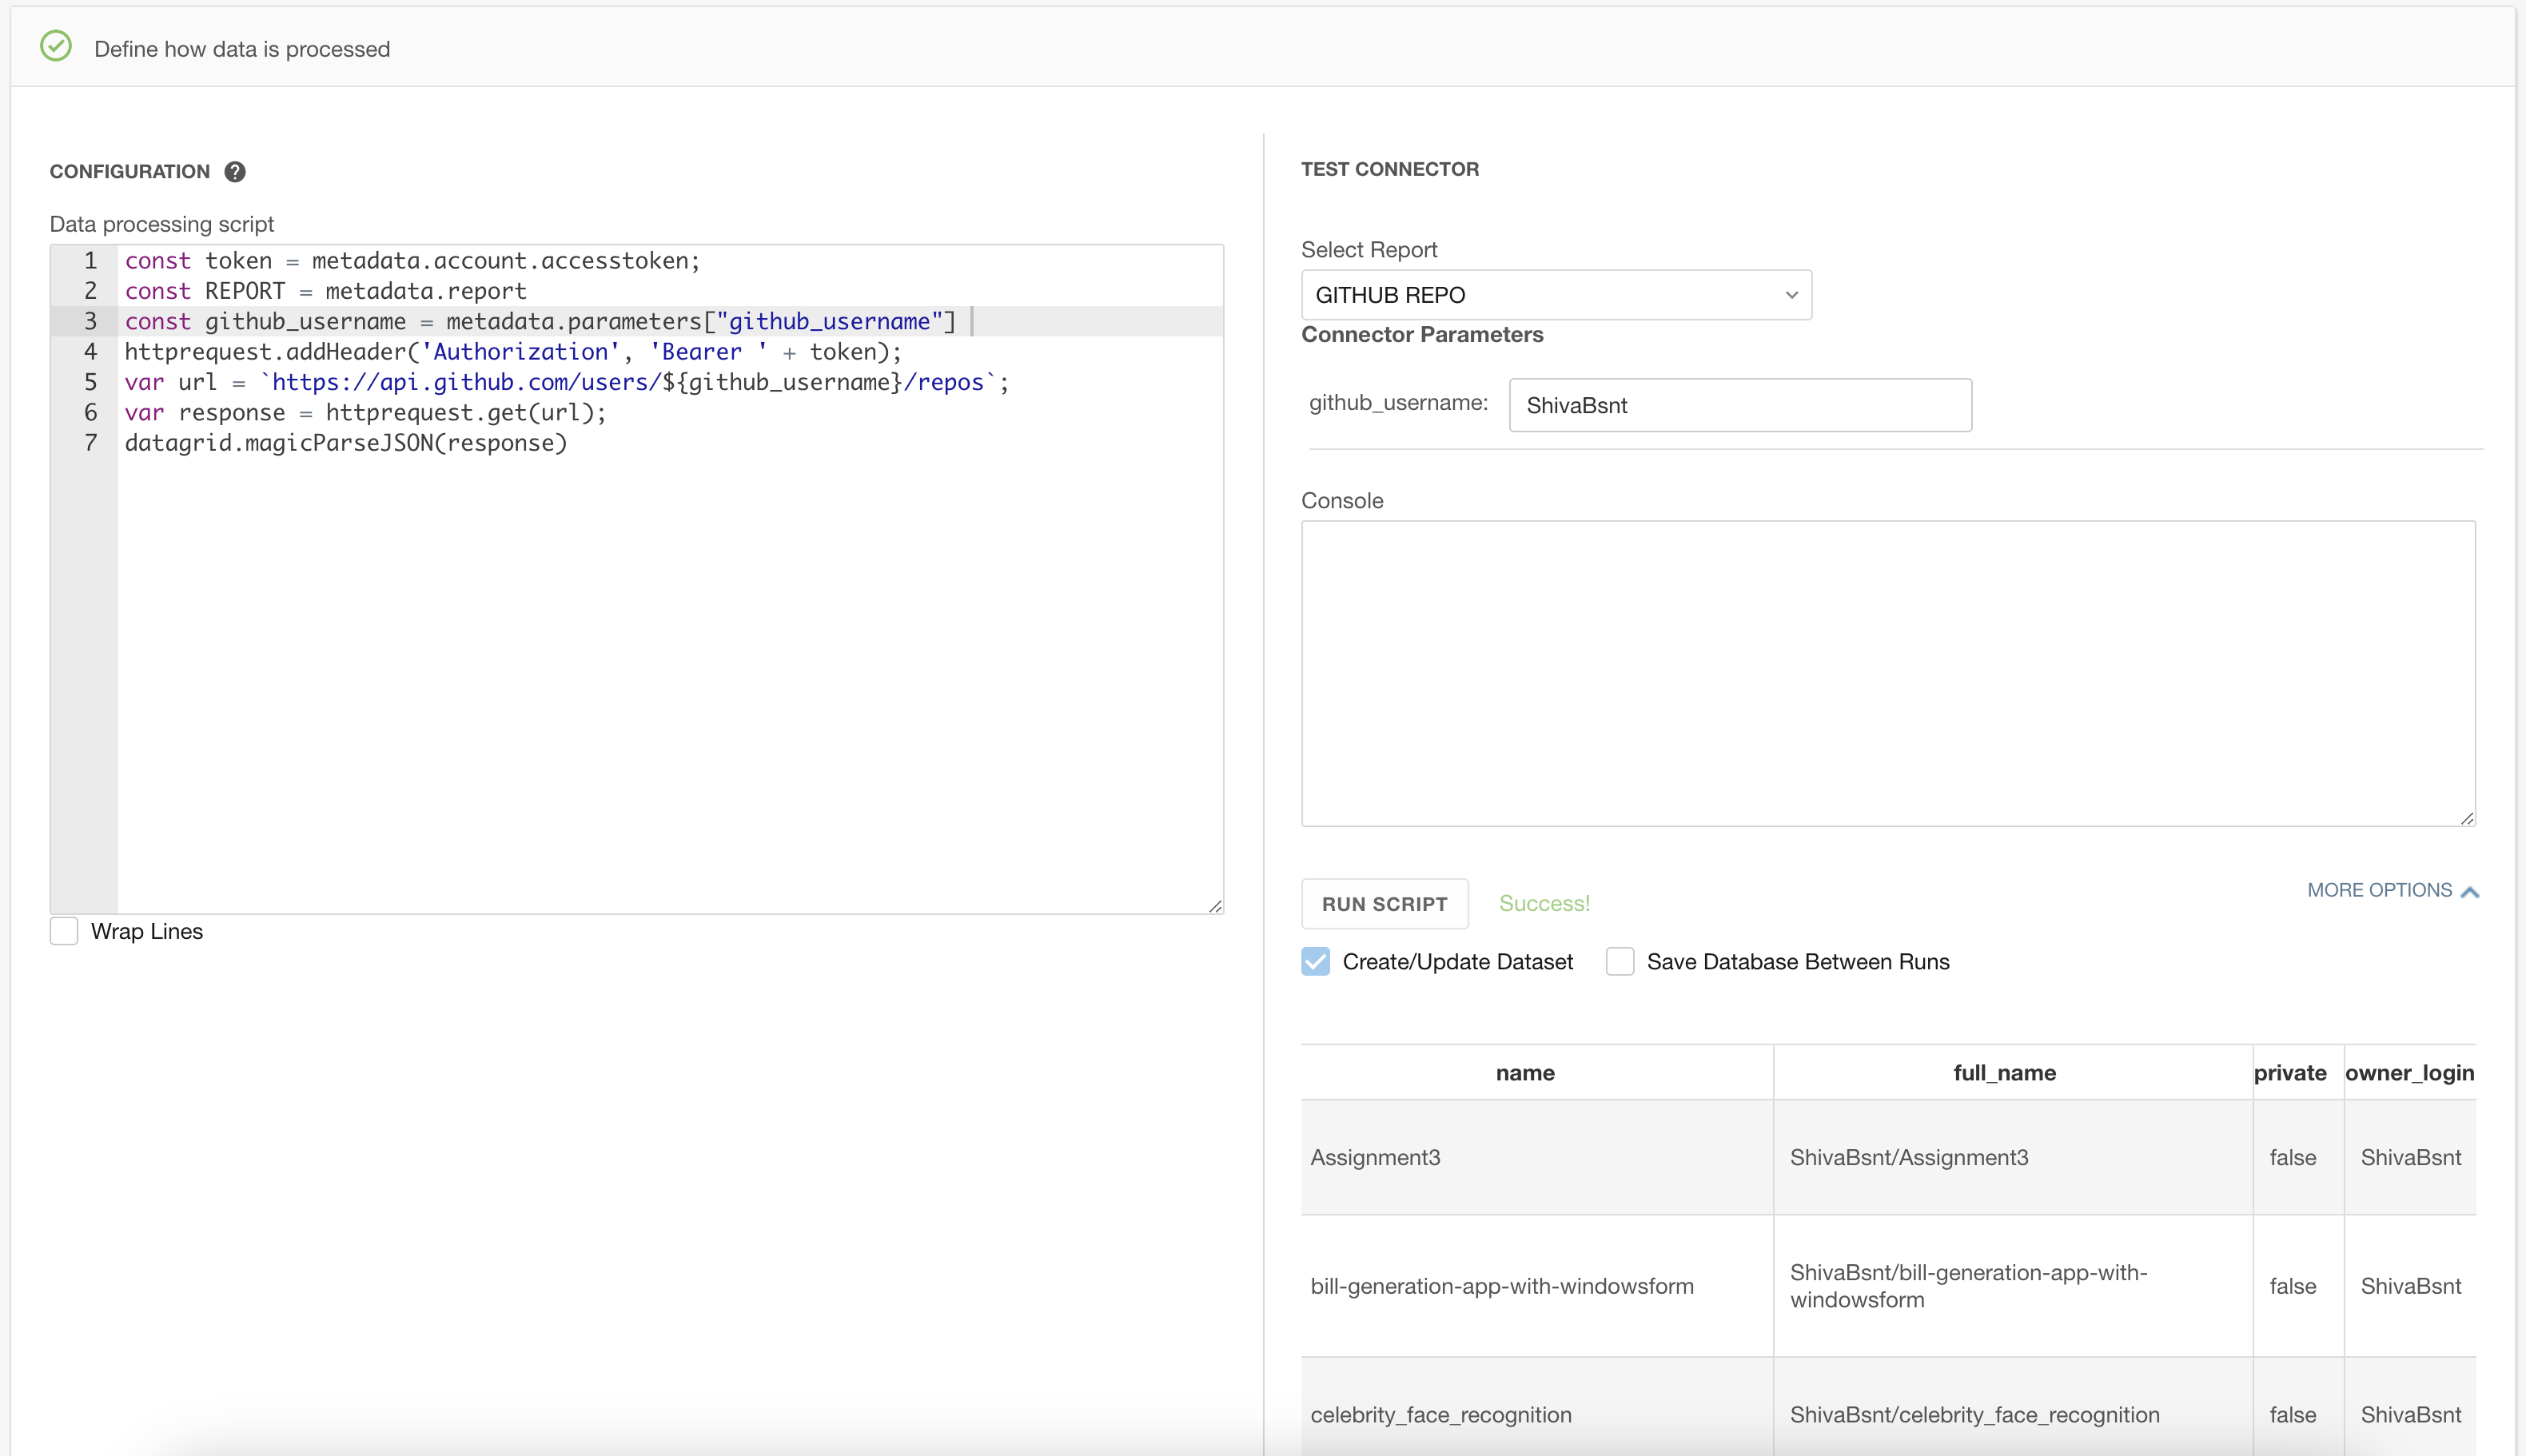 We are prepared to specify how to handle the data received from the API endpoint, once we have established the authentication and reporting. We require a little knowledge of inbuilt Domo methods and of JavaScript.
Code
// gets the access token
const token = metadata.account.accesstoken;

// retrieves report name "GITHUB REPO" in this case.
// The value of report is not used anywhere in this case.

const REPORT = metadata.report;

// Gets the username as the input parameter
const github_username = metadata.parameters["github_username"];

// Creates httprequest with the token and adds header
httprequest.addHeader("Authorization", "Bearer " + token);

// Creates dynamic URL using user Github name
var url = `https://api.github.com/users/${github_username}/repos`;

// Performs get request to the provided URL
var response = httprequest.get(url);

// Parse the response returned frm URL
datagrid.magicParseJSON(response);
Step 12: Test the connector
Now we are ready to test the connector. Please follow the steps below:
- Add github username parameter.
- Check Create/Update Dataset to create or update the dataset to Domo.
- Run “Configure user authentication” script.
- Run “process data” script.
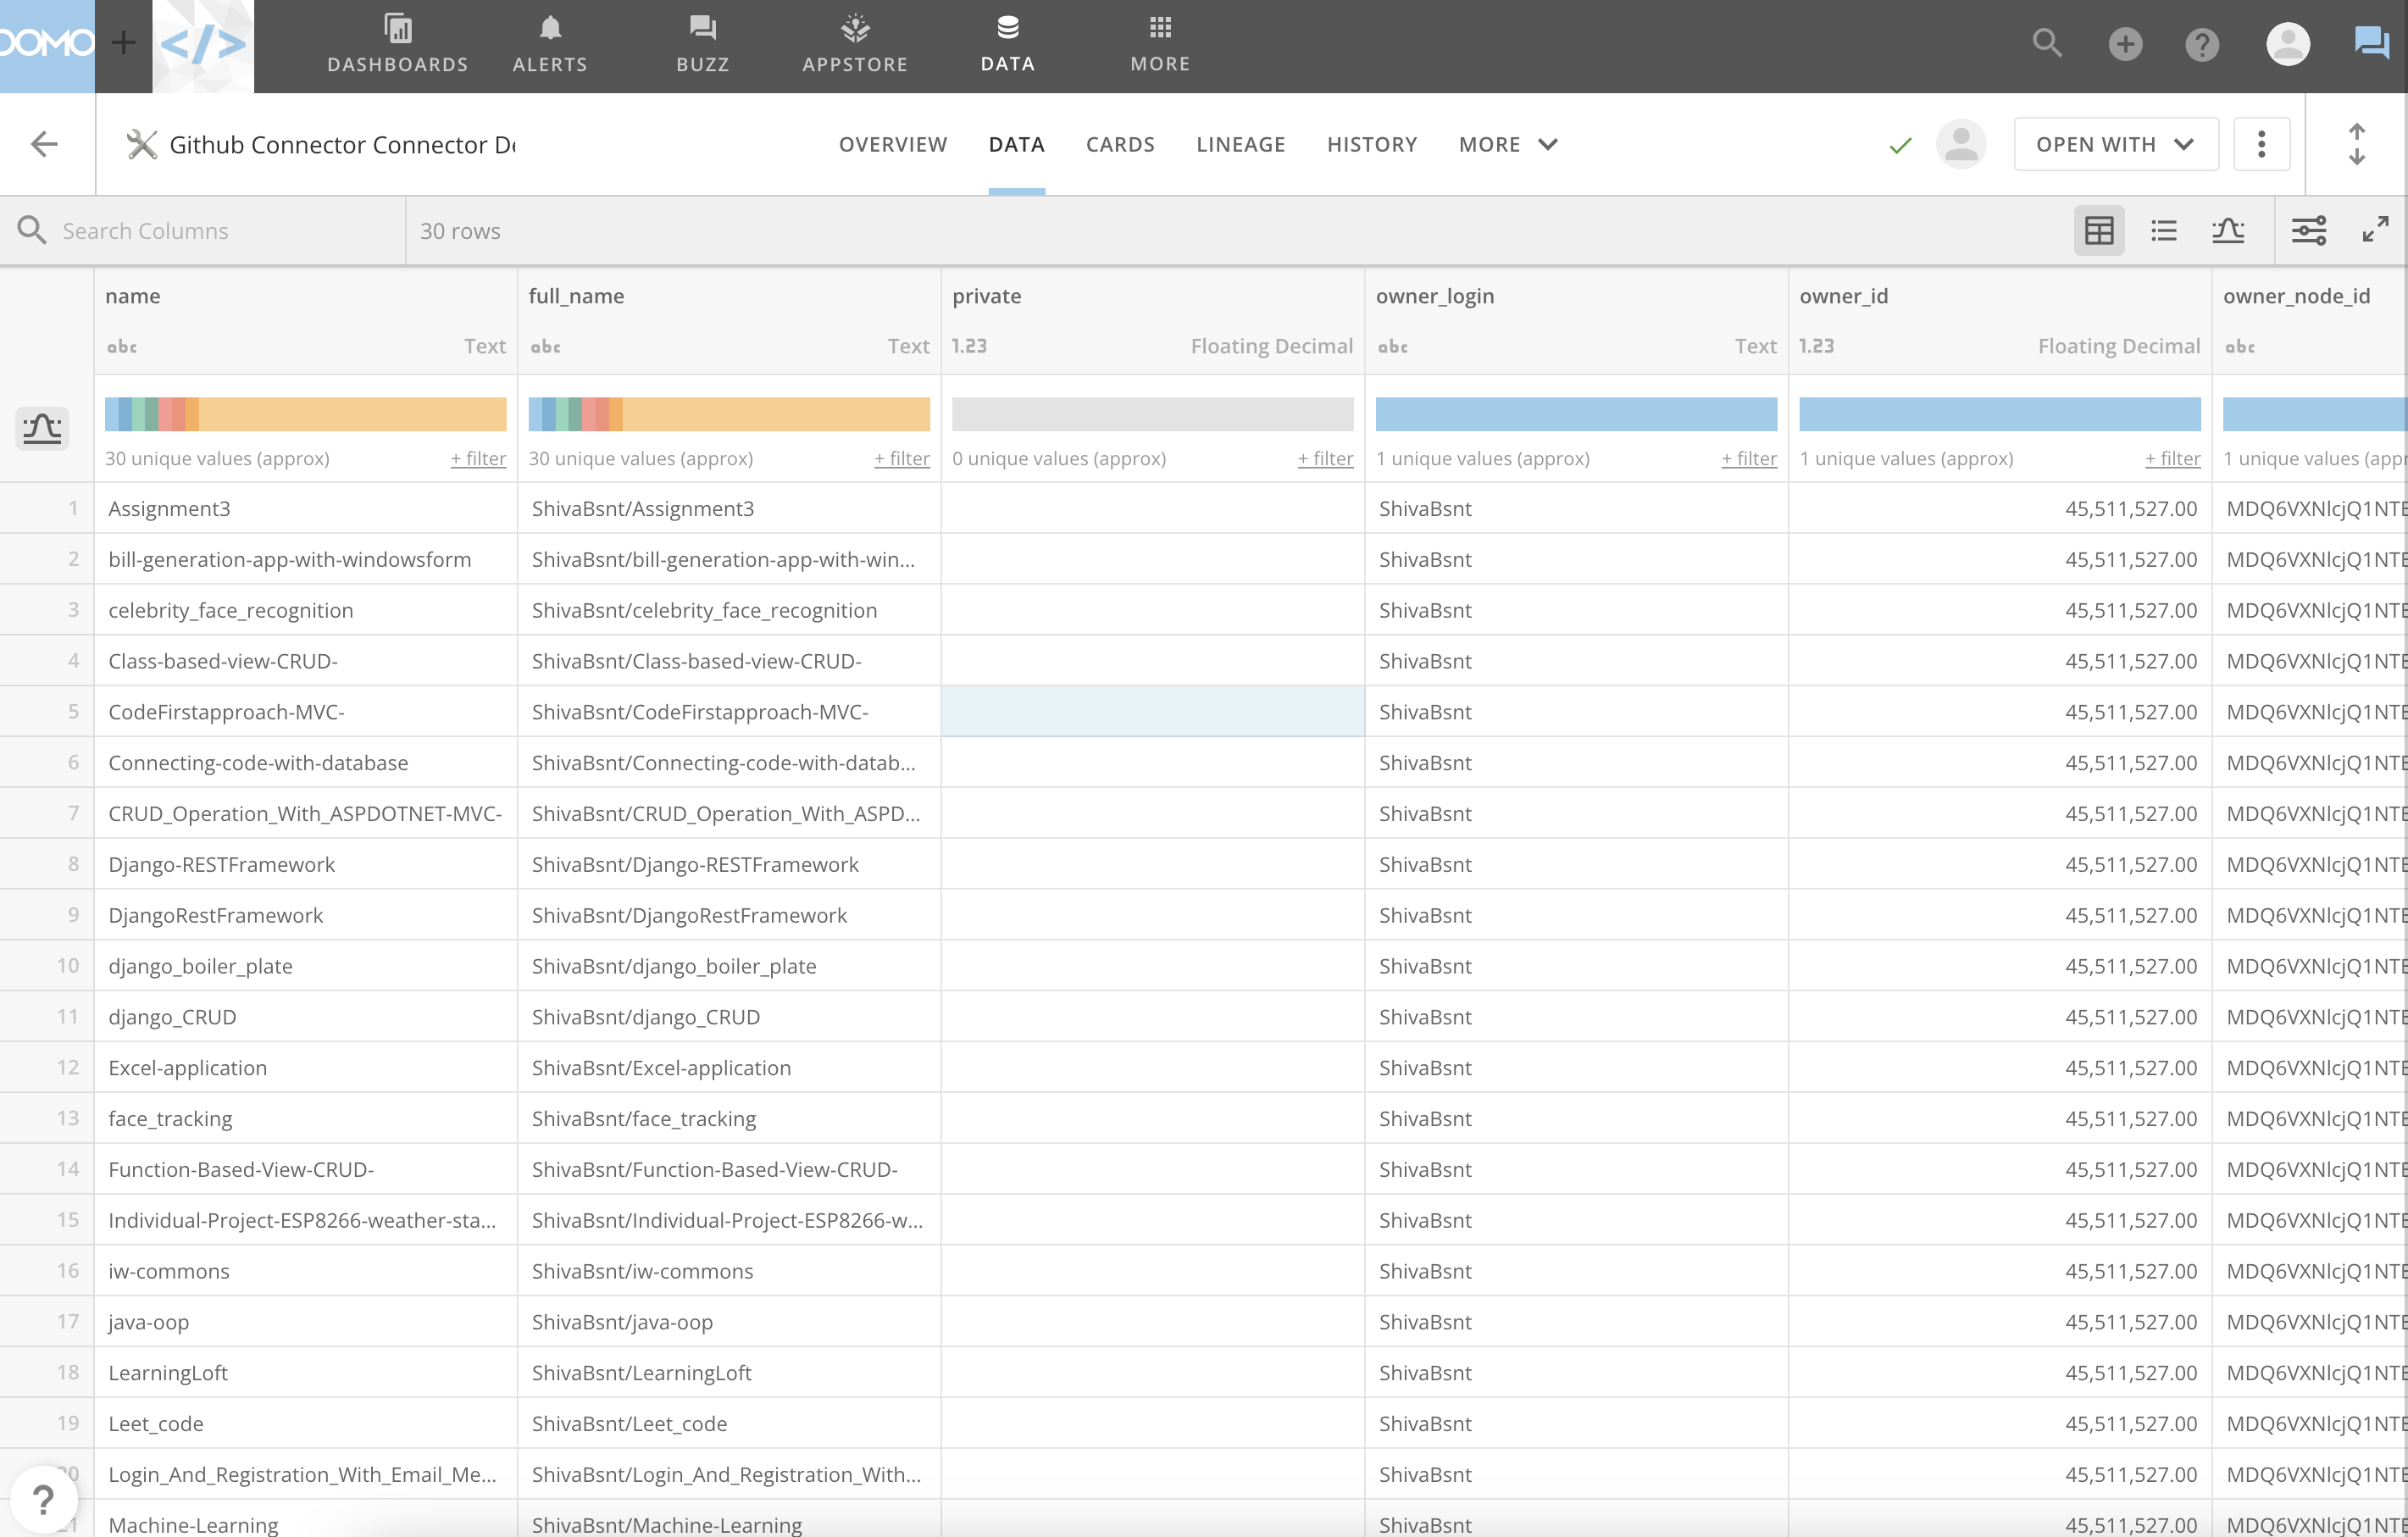

👏👏 If we see a data in console after running the script and a new dataset being created in Domo then we are good to publish the connector.👏👏


Leave a comment