
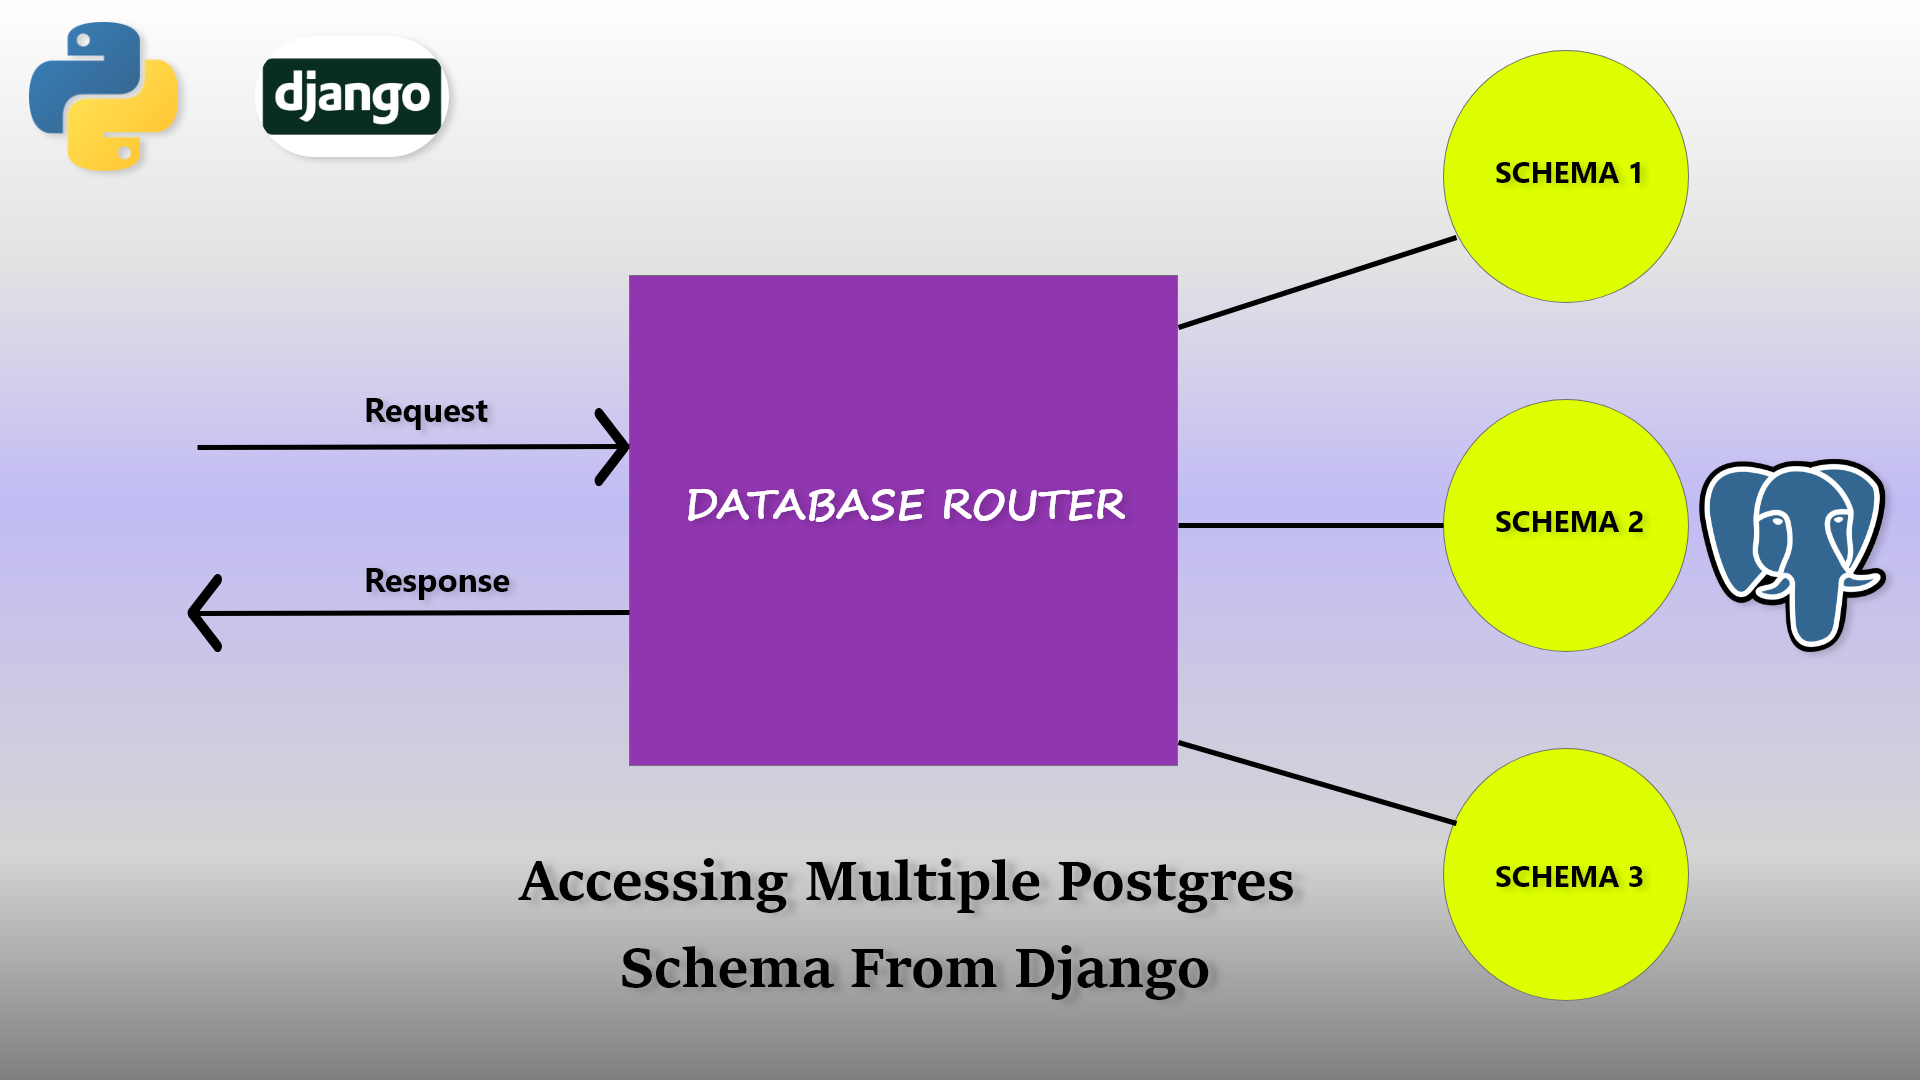
Accessing Multiple Postgres Schema From Django
Database Configuration in PostgresSQL
Step 1 : Create database on PostgresSQL
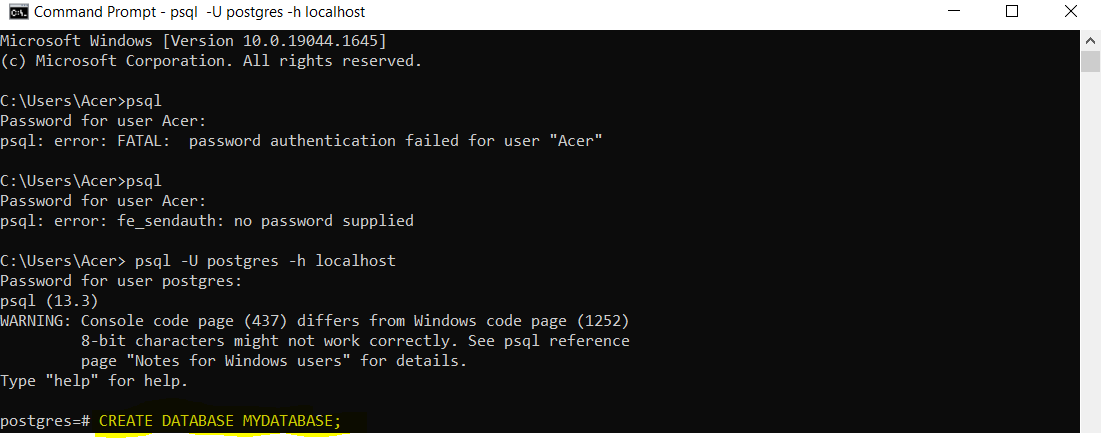
Once you see a postgres console create a database with the command below:
CREATE DATABASE newproject;
Step2. Create a database user
The command above only creates a database but if we need to create a database user, we need to run the command below:
CREATE USER newprojectuser WITH PASSWORD 'password';
Step3. Grant priviliges to user on database
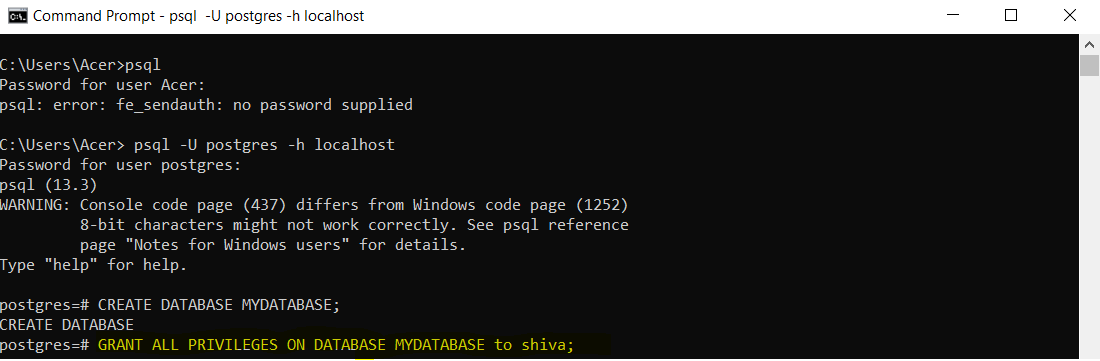
We have already created a database and user for the database but we need to provide all the privileges to user on that database.
GRANT ALL PRIVILEGES ON DATABASE newproject to newprojectuser;
Step4. Create new schema
By default the schema called “Public” is created. Since we are going to use multiple schema, let’s create a new schema called schema1.
Before creating schema, make sure you have selected a right database. First connect with the recently created database and then create a new schema.
To connect with a database run the command below:

\c database_name
Command to create a new schema:

create schema schema_name
Now to make sure that the schema is created. Run the command below to see available schema in a database:
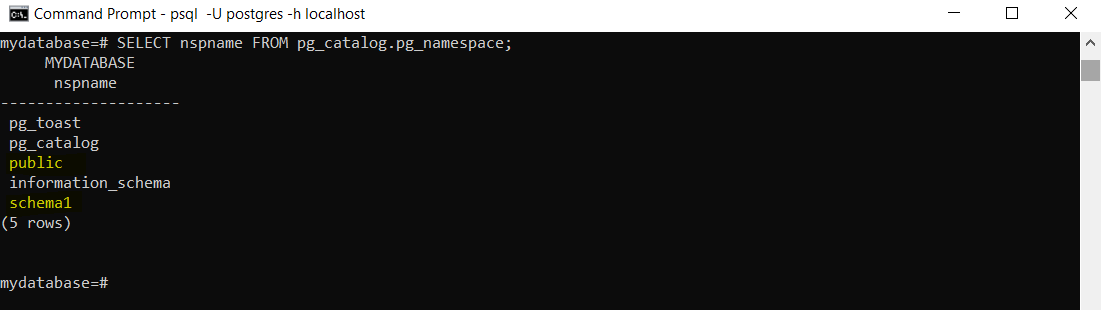
SELECT nspname FROM pg_catalog.pg_namespace;
Step5. Grant all privileges on new schema
A newly created schema requires privilege. So we need to provide privilege to our database user (in my case “shiva”) to perform action like CREATE, UPDATE, READ, DELETE.

GRANT ALL ON SCHEMA schema_name TO schema_user;
Using PostgresSQL with Django
Our database is all set, now it’s time to connect django with postgresSQL. Place the settings below in settings.py
1
2
3
4
5
6
7
8
9
10
11
12
13
14
15
16
17
18
19
20
21
22
23
24
25
26
DATABASES = {
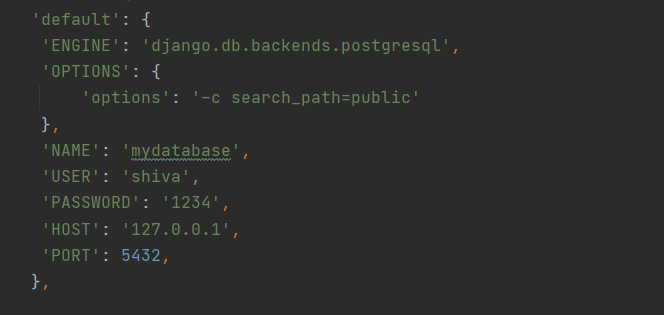
'default': {
'ENGINE': 'django.db.backends.postgresql',
'OPTIONS': {
'options': '-c search_path=public'
},
'NAME': 'mydatabase',
'USER': 'shiva',
'PASSWORD': '1234',
'HOST': '127.0.0.1',
'PORT': 5432,
},
'schema1': {
'ENGINE': 'django.db.backends.postgresql',
'OPTIONS': {
'options': '-c search_path=schema1'
},
'NAME': 'mydatabase',
'USER': 'shiva',
'PASSWORD': '1234',
'HOST': '127.0.0.1',
'PORT': 5432,
}
}
The first one is the configuration for our default public schema and the second one is for our newly created schema (in my case schema1). Replace the value of search_path if your schema is different.
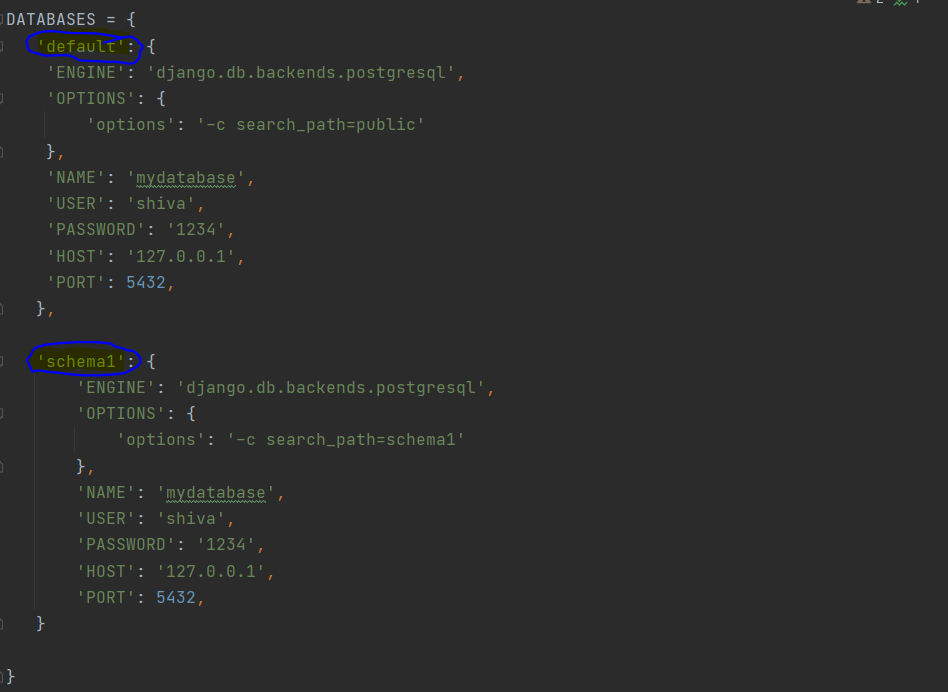
By default, django uses configuration of default highlighted above. And instead of schema1 any name can be used. It’s just a key for django. It has nothing to do with database name or schema name. Now we are good to go and our django is ready to communicate with database and our schemas.
Database Router Configuration
While using multiple schema and database, we need to guide django where to write and where to read from. In absence of router it continues to read and write from our default configuration.
Place the configuration below in settings.py to let django know which router to use for database.
1
2
3
4
DATABASE_ROUTERS = [
#project_name.router_python_file.class_name
'MultipleSchema.dbrouter.DefaultRouter',
]
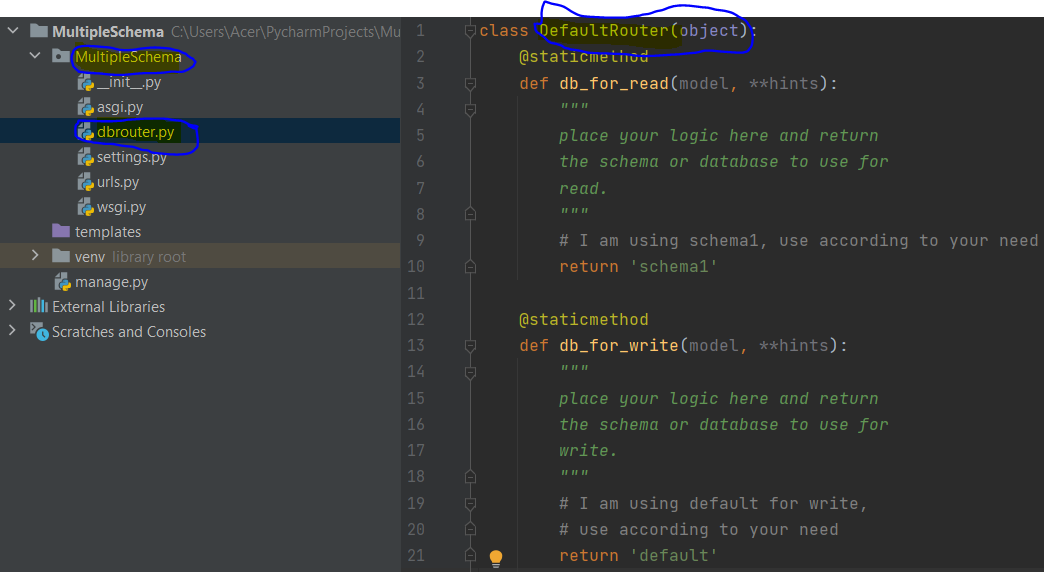
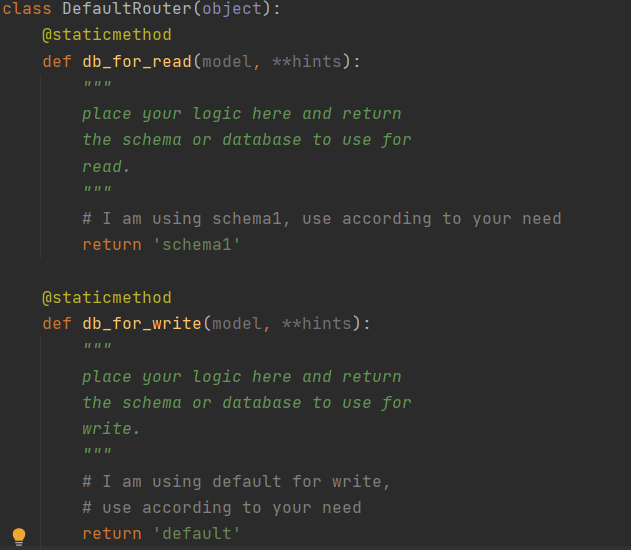
Now inside class DefaultRouter, write your logic and return which schema or database to use for read or write. For demo purpose, i have used schema1 for read and default for write which uses public schema.
Now django is ready to interact with both of our schemas and will continue to use schema1 for read and default for write. If you want to know more about database router use django documentation. (https://docs.djangoproject.com/en/4.0/topics/db/multi-db/#database-routers)
Extra tips
We can also select database or schema to use using django ORM
-
To select all the data of specific model from specific scheme or database
Model.objects.using(‘schema_name’).all() Model.objects.using(‘database_name’).all()
-
To save in specific schema or database
model_obj.save(using=’schema_name’) model_obj.save(using=’database_name’)
************* HAPPY CODING ***************


Leave a comment