
Connecting NodeMCU with Firebase
Before connecting, lets start with what is nodemcu?
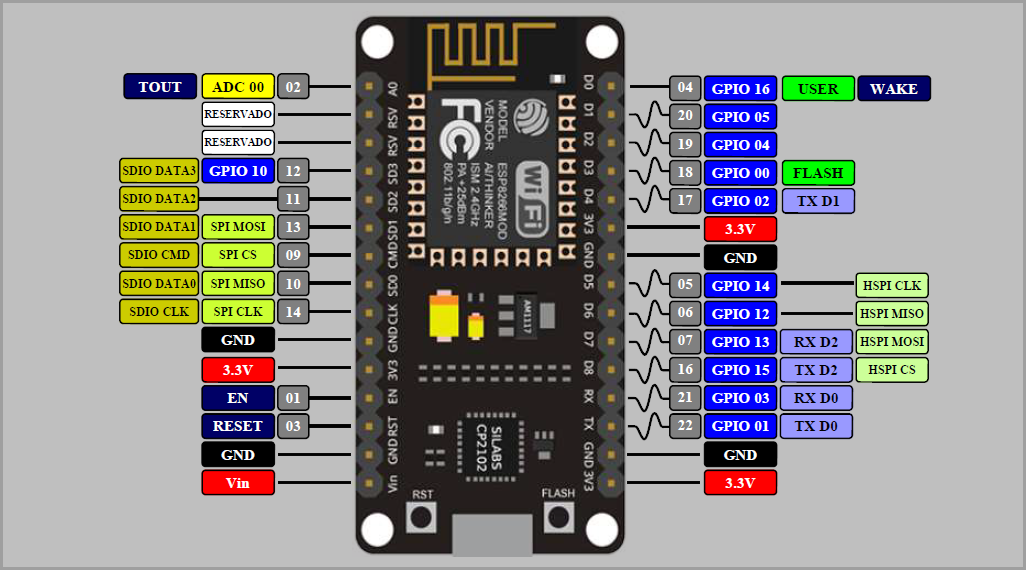
NodeMCU is an open source LUA based firmware developed for ESP8266 wifi chip.It has 4MB of flash memory to store a program and the RAM of 128KB. It is a bluetooth as well as wifi hardware which makes it ideal for the IOT(The Internet of Things) projects. It can be powered with a Micro USB jack or the Vin and Gnd pin can be used to power supply externally.
Now let’s look at firebase setup
-
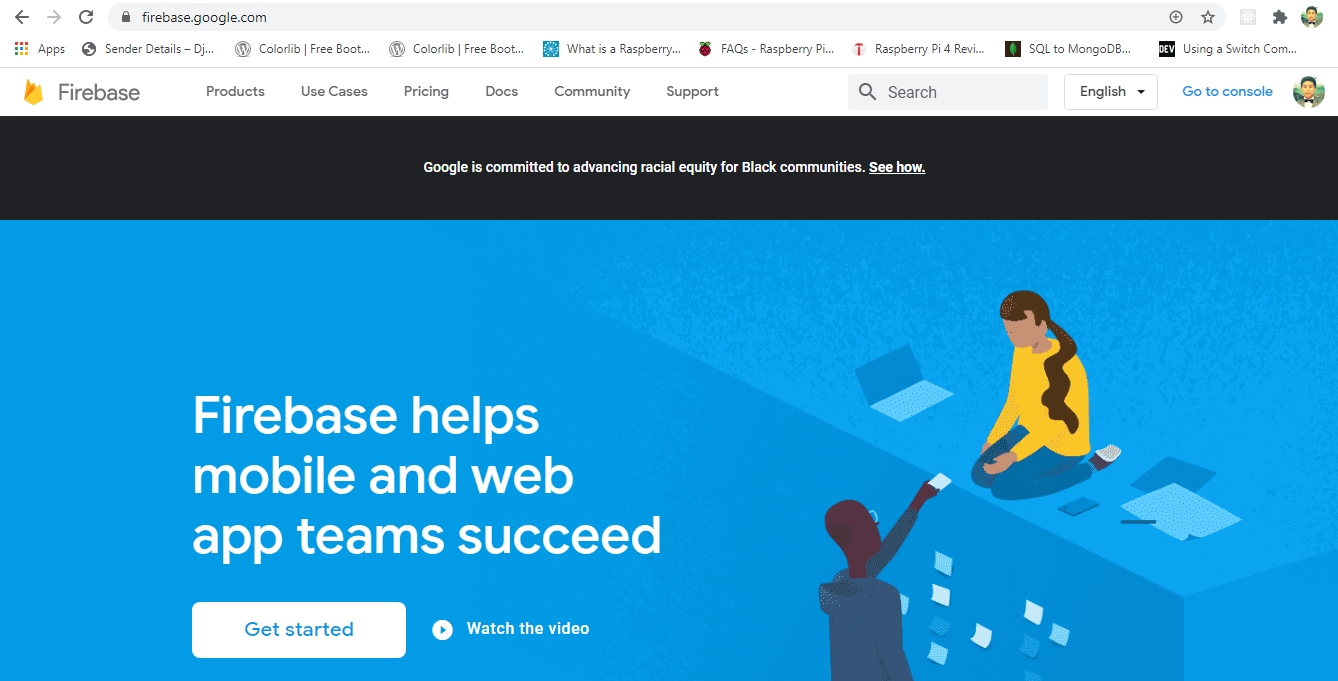
Go to the firebase official website.(Firebase)
-
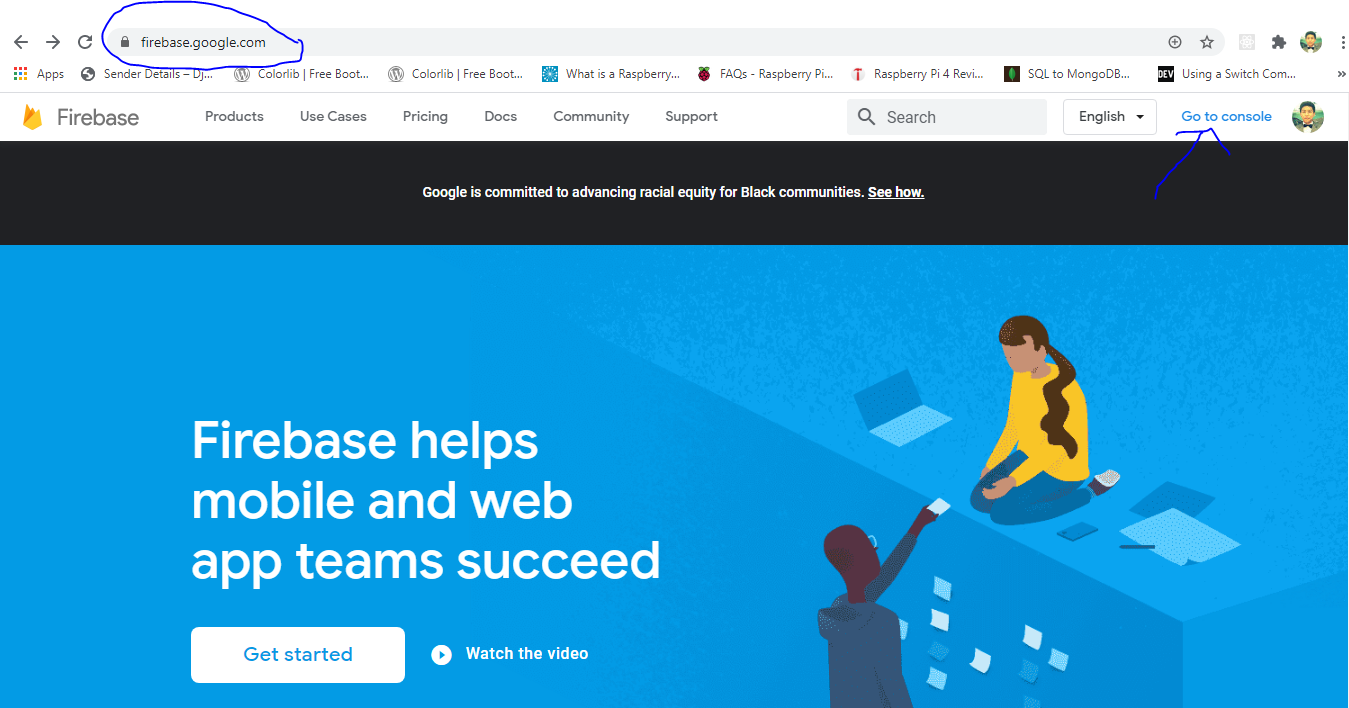
I am assuming that you have a google account here. Now click to the “Go to console” button at top right corner.
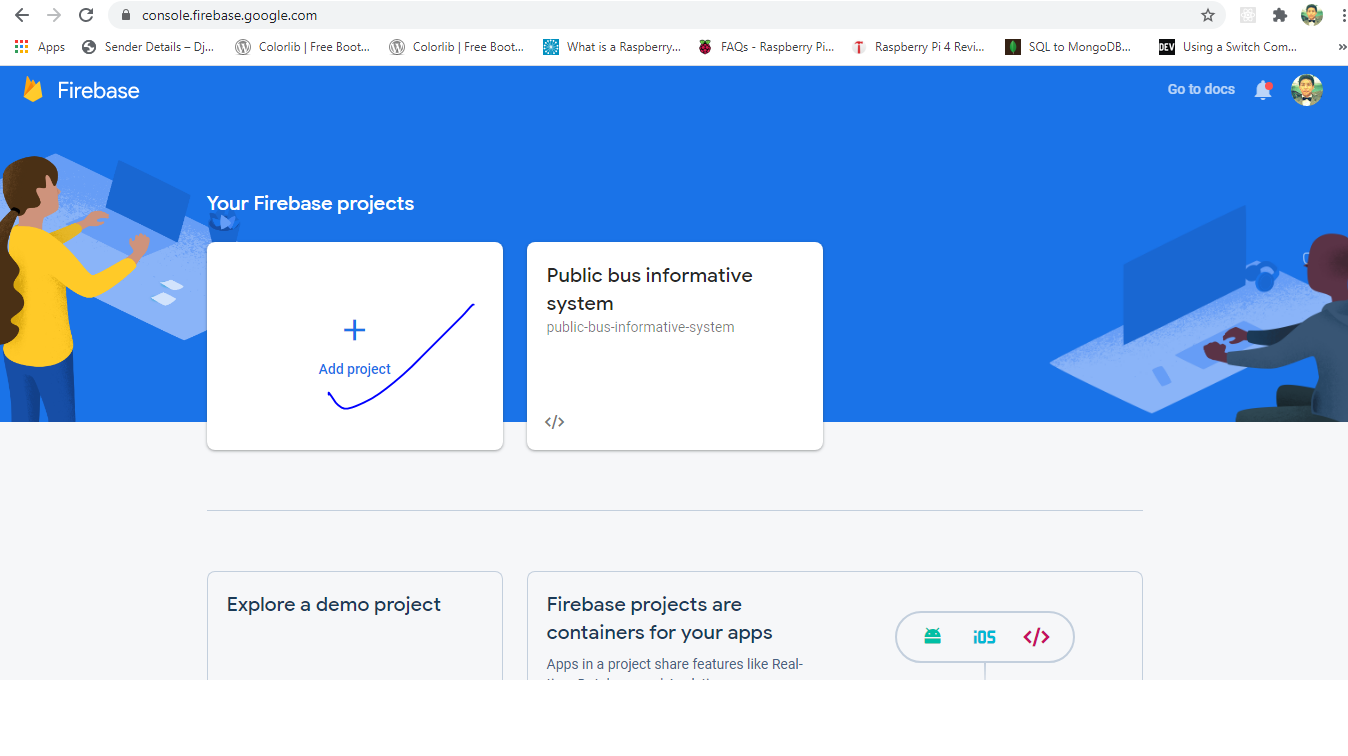
- Click on “Add Project” to create a new Firebase project.
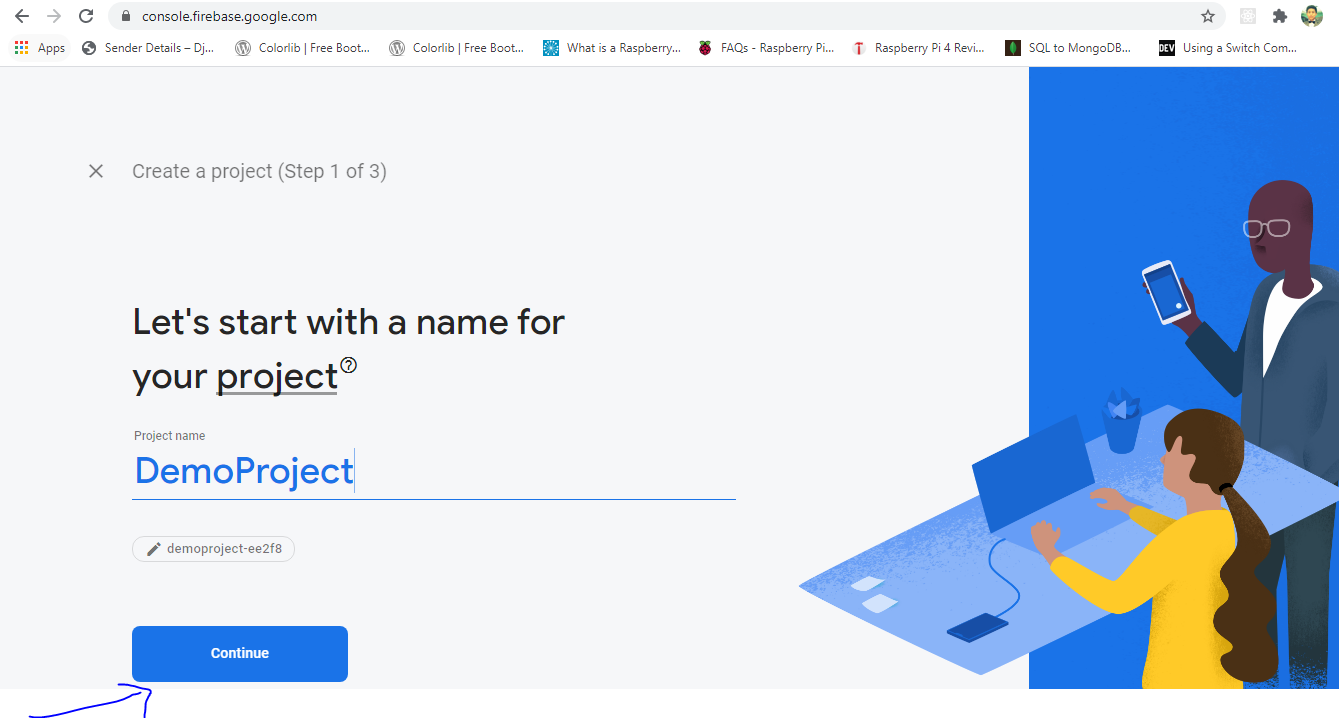
- Give a name to your project and click “Continue”.
-
It depends upon the user project needs to whether enable google analytics or not. But for learning puropose you can disable this feature and proceed further by clicking on “Create a Project”.

-
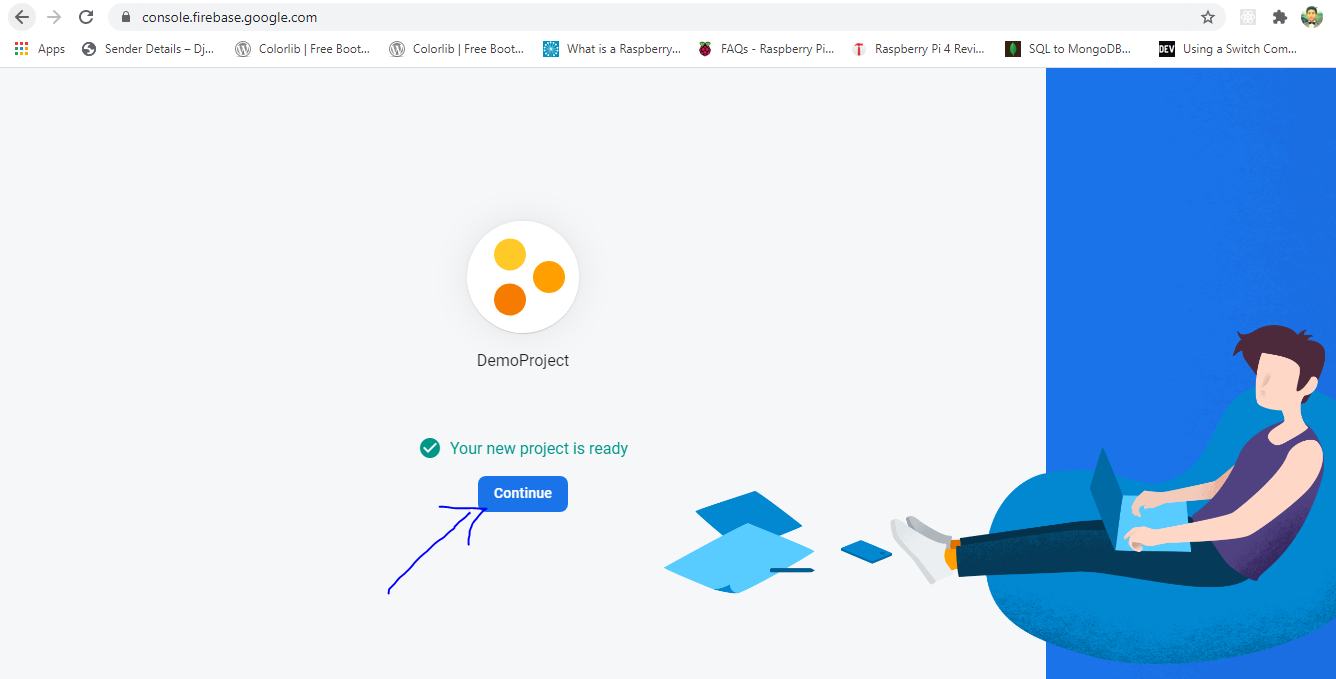
Click on “continue” once your new project is ready.
-
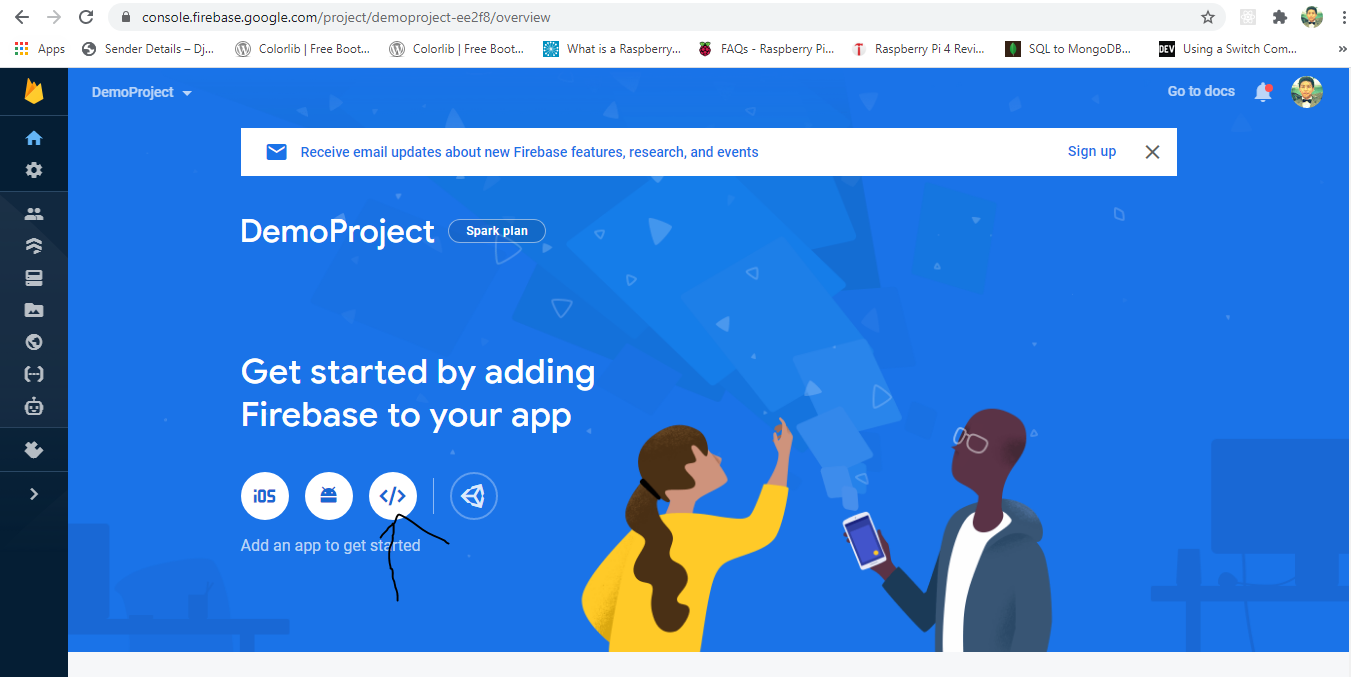
You must have been landed on home page of your project now. You will see an option of “Ios” ,”Android” and “Webapp” to get started. According to the needs you can select whether you want Real time datbase for “Ios”,”Android” or “Webapp”. Since we want to connect it with Nodemcu,so click on “Web app”. (</>)
-
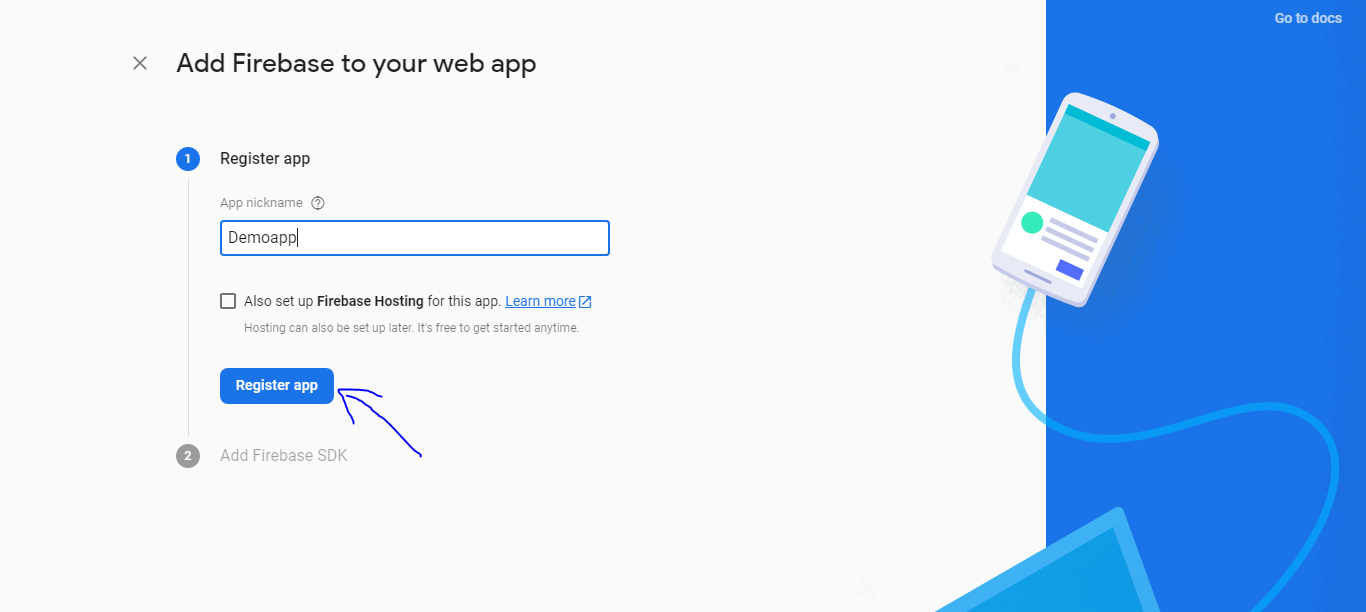
Give a name of the app you are developing to register it and click on “Register app”.
-
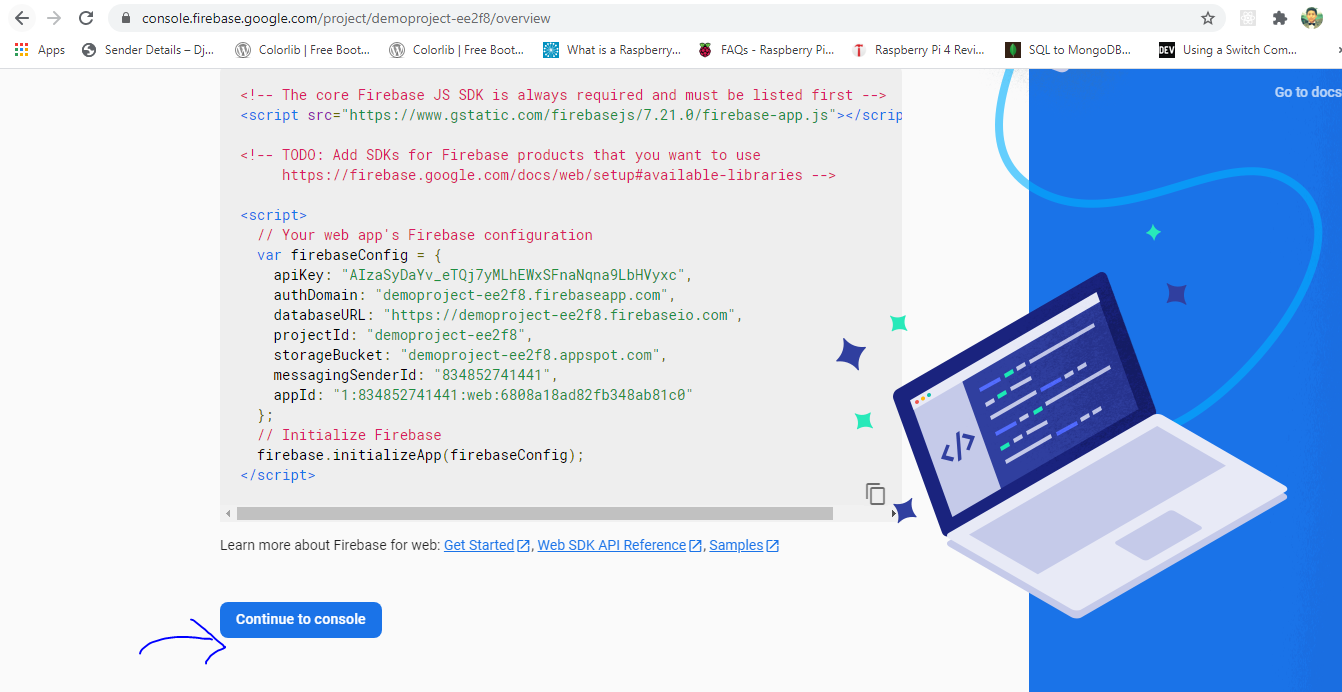
Scroll page a bit and then you should see “Add firebase SDK”. It contains a lot of information like api key, authdomain, projectId etc. Among them we need “databaseURL” to connect our nodemcu program with firebase.Copy the “databaseURL” in Notepad and save to your pc then press “Continue to console”.
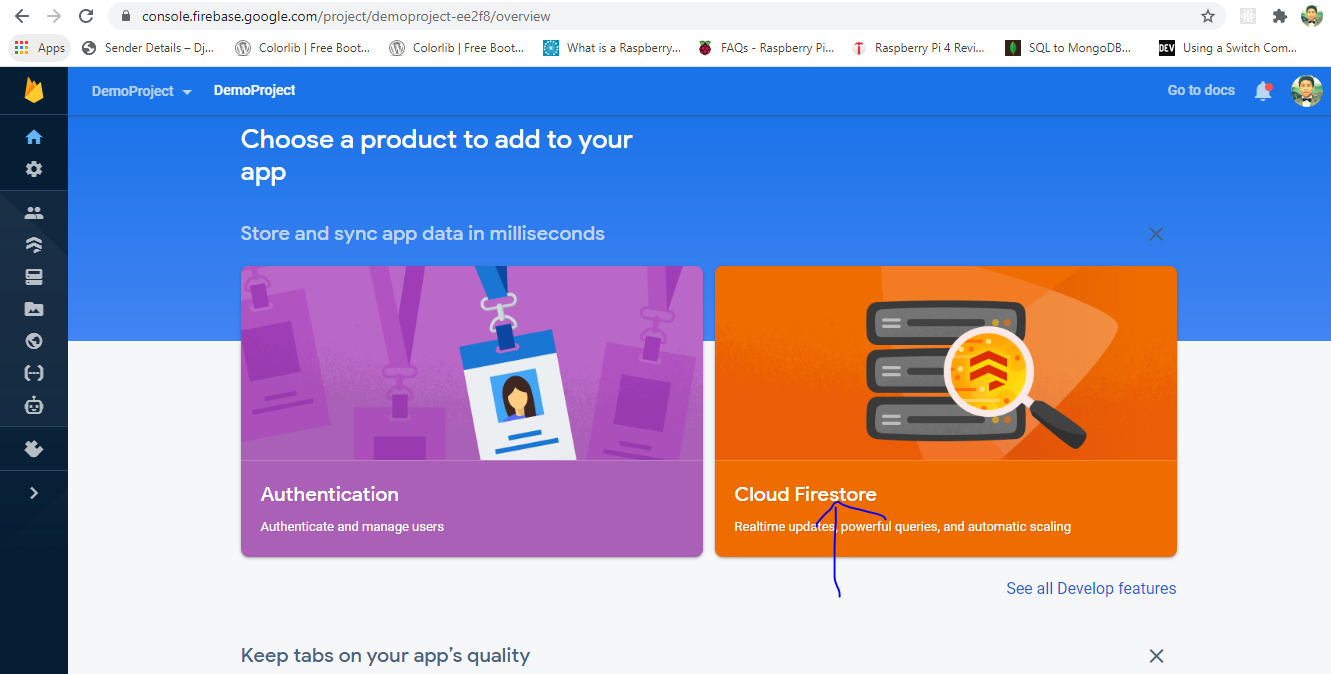
- Simply click on “Cloud Firestore”.
-
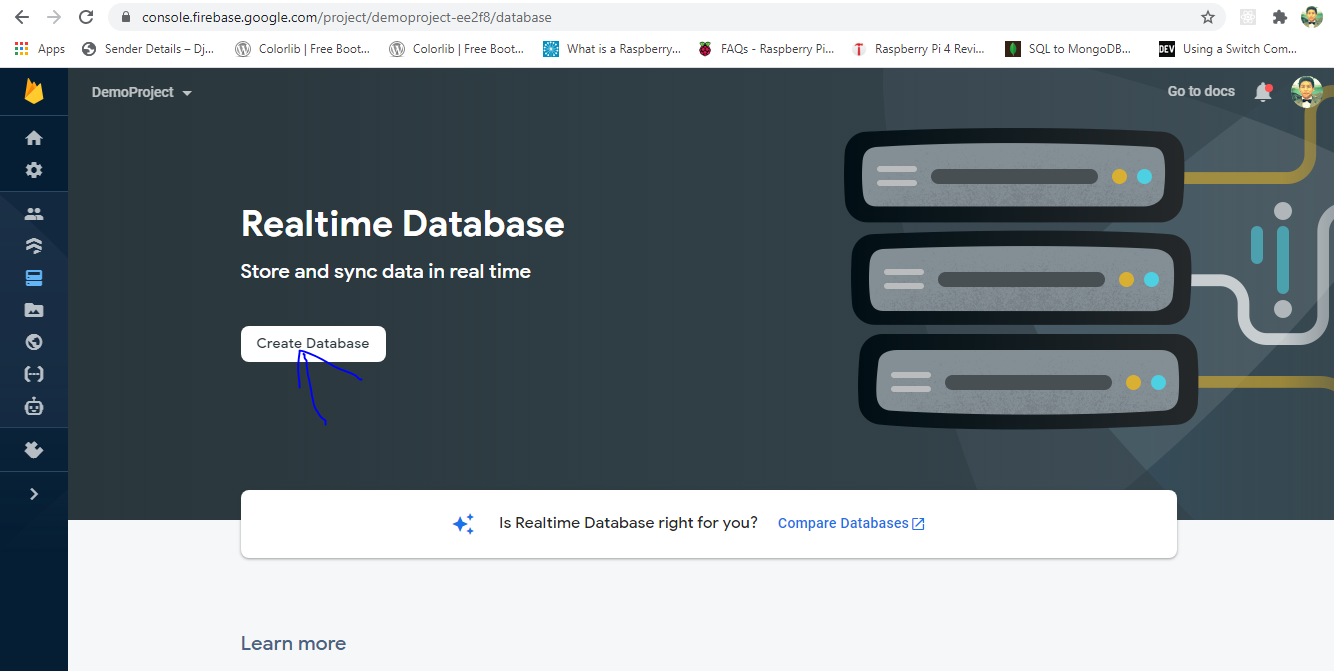
Click on “Create Database” to cread a cloud database for our app.
- There are two security rules. Use Test mode so that you can read as well as wite data. If you really want to select “Start in locked mode” then make sure that you change the security afterwards into (read:true, write:true).

-
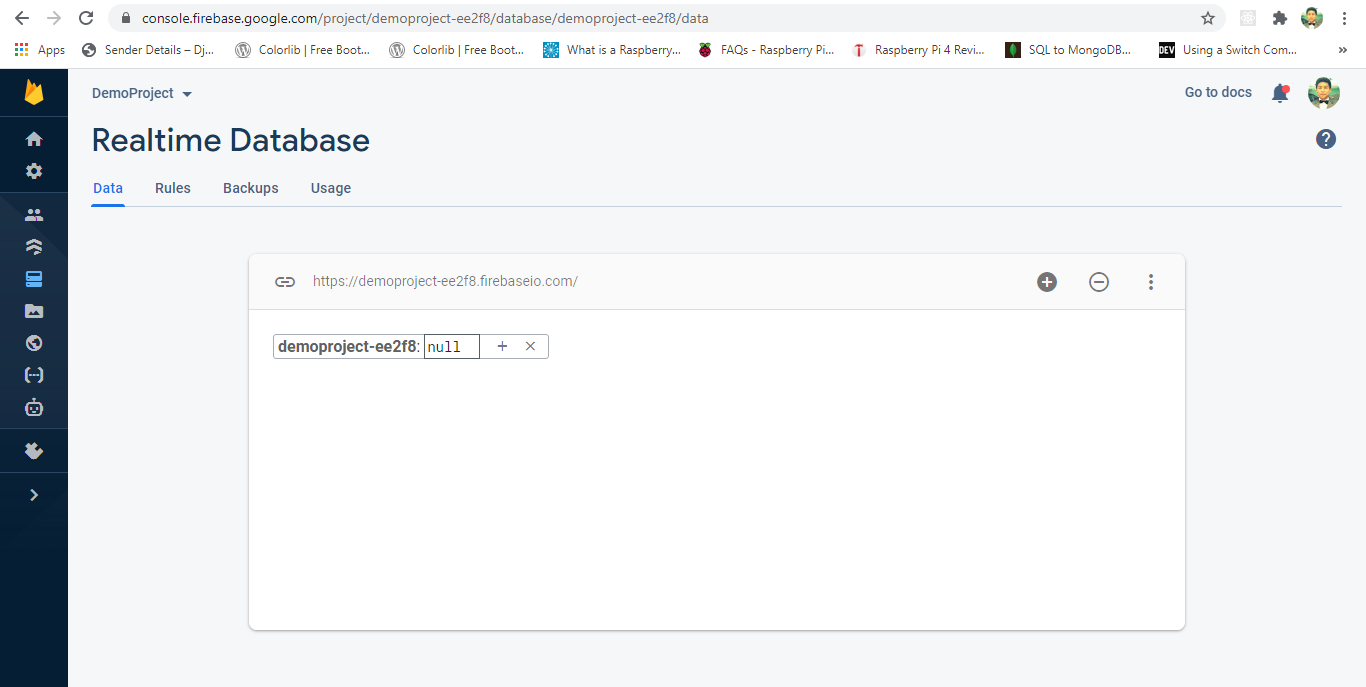
Bravo we are done. We have sucessfully created a Real Time database for our project.
- Before Wrapping things up, lets copy the database secret key which is a real key to our Real Time database.
- a) Go to the “Project setting”.
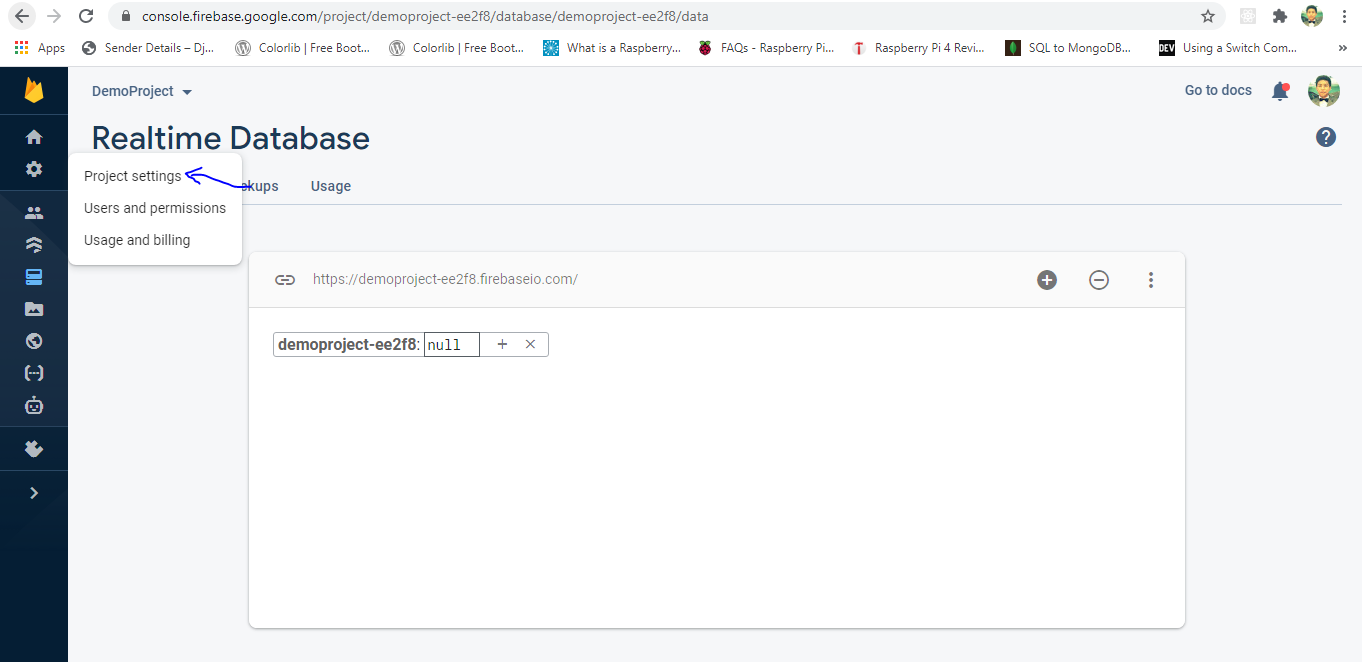
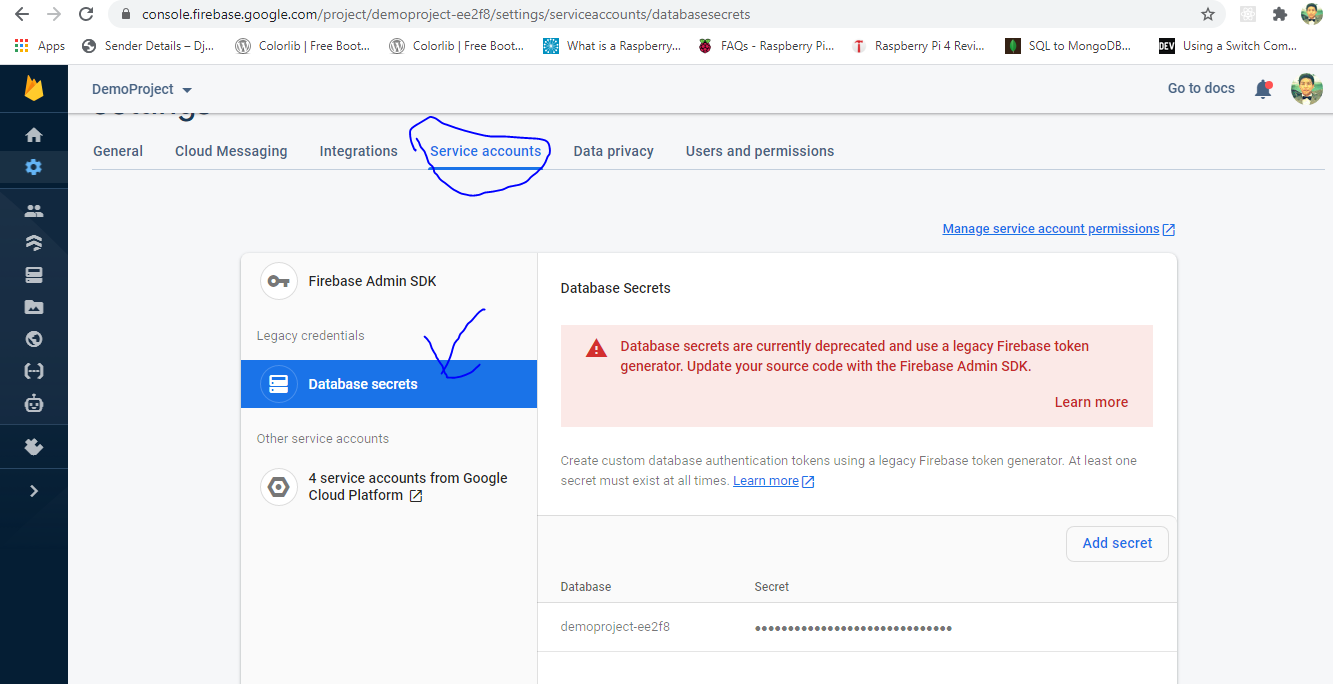
- b) Go to the “Service accounts” and click “Database Secrets”.
- a) Go to the “Project setting”.
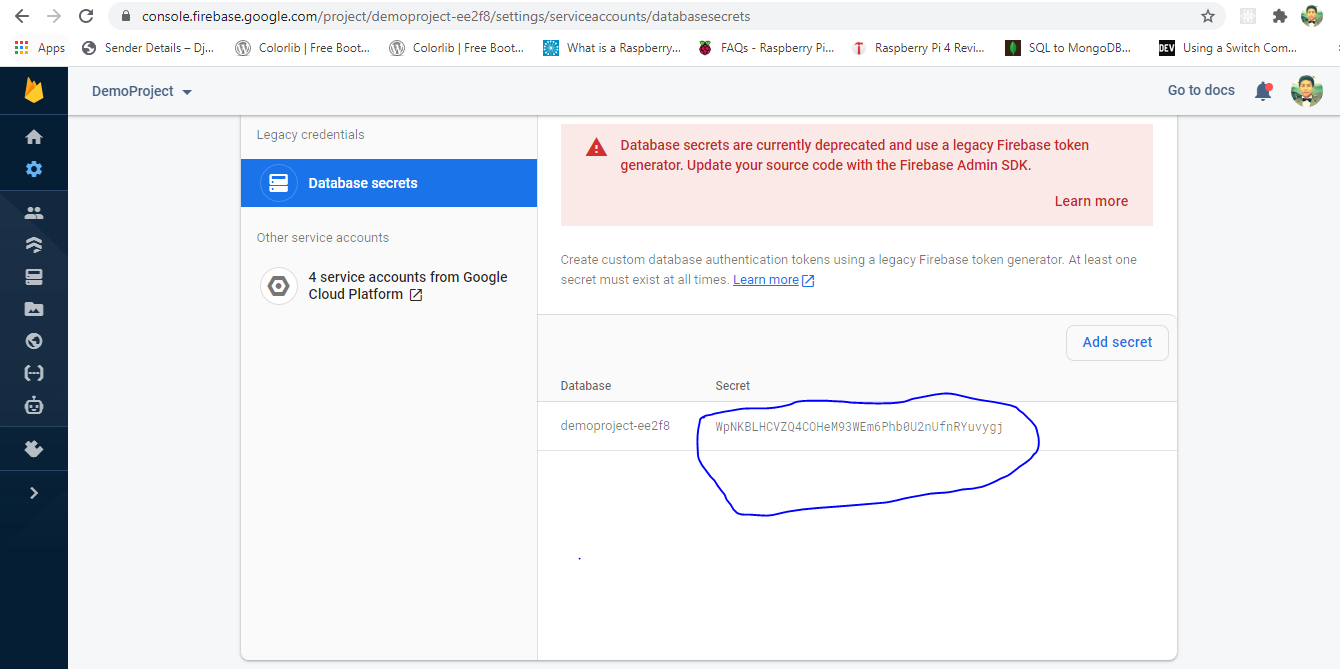
- Copy the Database Secret key and save it to the Notepad where you have previously saved “databaseURL”.
Since we are done with Firebase now let’s look at Nodemcu Setup
Note: Before starting, make sure that you have “Esp8266Wifi” and “FirebaseEsp8266” library installed. The Esp8266Wifi allows you to connect your device to the wireless network and FirebaseEsp8266 allows you to communicate with google provided feature “Firebase” to post or retrieve data.
-
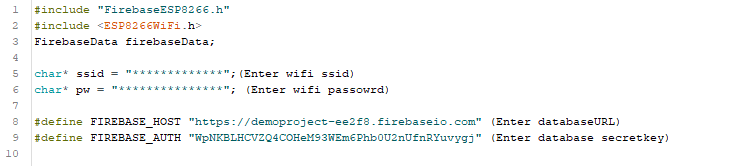
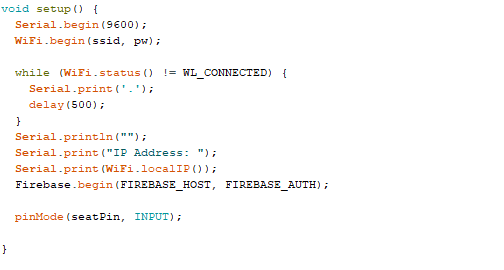
Include libraries Esp8266Wifi and FirebaseEsp8266. Setup firebase host and authentication key. provide credential to the wireless device so that the nodemcu could connect to the wifi and share data wirelessly.
-
Write a code to connect nodemcu with wireless network and began communication of nodemcu with firebase.
-
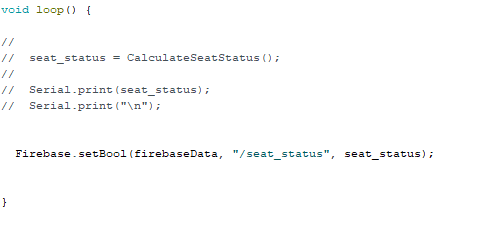
You have sucessfully connected nodemcu with firebase. You can write data into cloud firebase now.You can send boolean, integer,string or any other value to the firebase.To have a clear idea, look at the example below. There the boolean data has been sent instead of that you can use “Firebase.setString” to send string data and “Firebase.setInteger” to send Integer value. The format to send data is “Firebase.setBool(firbaseData,”name of the variable to store data”, actual_data)”.
 ********Happy Coding********


Leave a comment